
Seasonal
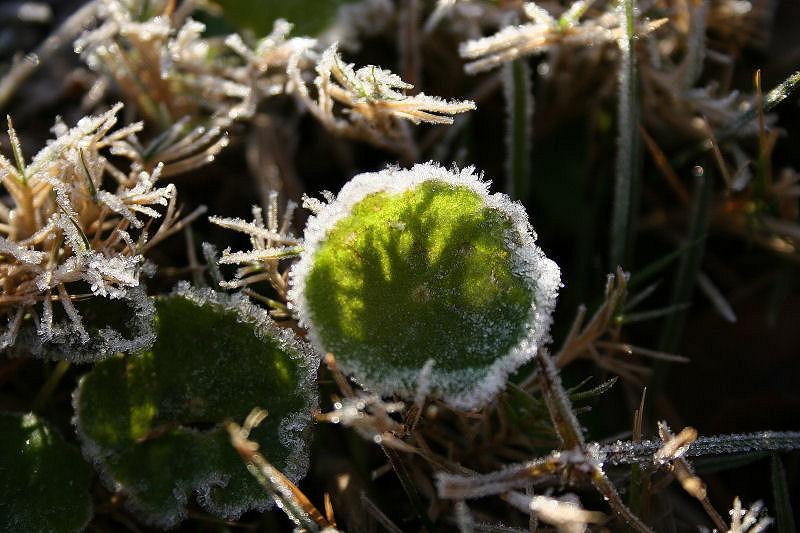
« Previous Entries Next Entries »Frosty morning
Wednesday, December 19th, 2007
Don we now our gay apparel
Wednesday, December 12th, 2007
The temperatures have dropped considerably here today… see what I found on the dining room shades this morning. Don we now our gay apparel!
First Snow, final update
Saturday, December 1st, 2007

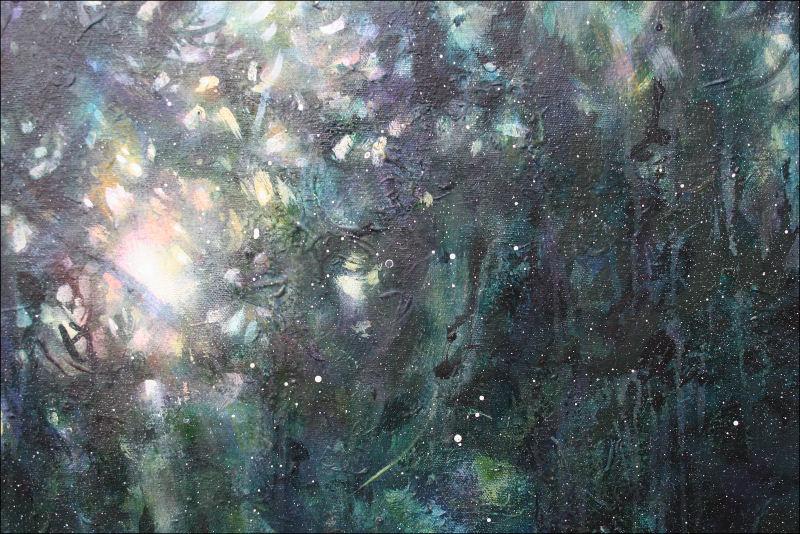
First Snow, 39H x 30W inches acrylics, crackle glaze on canvas and box-frame. Finishing: added some darker areas, dripped water down the top layer of glaze, and flicked some specks of white with a toothbrush. Sold, but can be replicated as a new, unique piece by special order in the same spirit as the original.
Detail images:
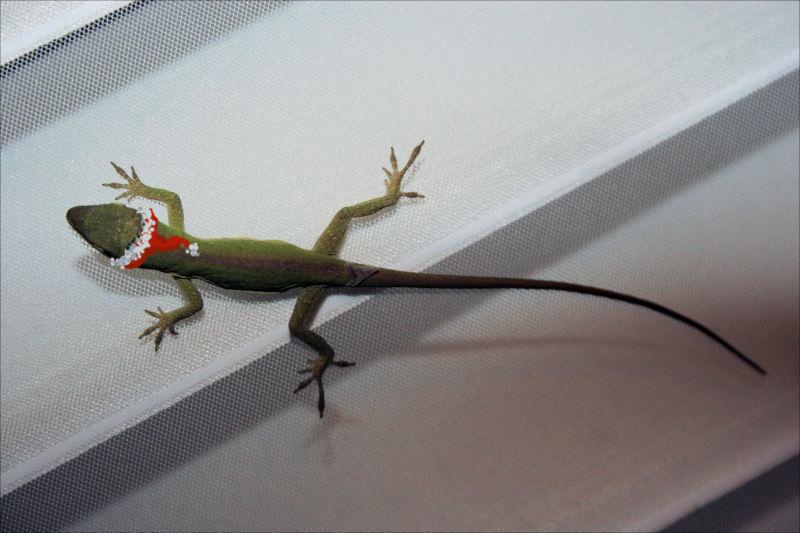
Anoles in the sun
Monday, November 19th, 2007
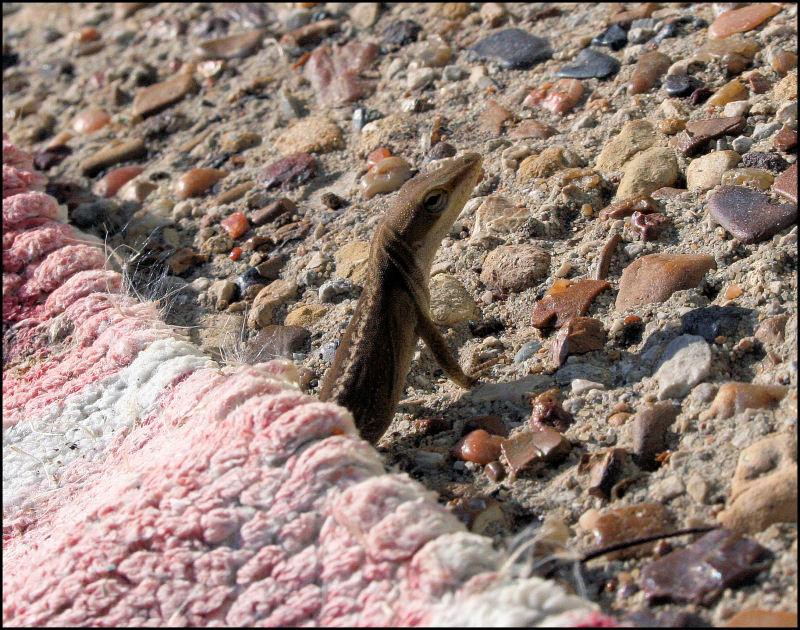


Today there were three anoles playing in a warm sunny area by the back door, changing shades of brown and green. There was a lot of rain earlier in the year, so that must be why there seems to be more this year than in the five years we’ve lived here.
Seasonal treasures
Sunday, November 11th, 2007
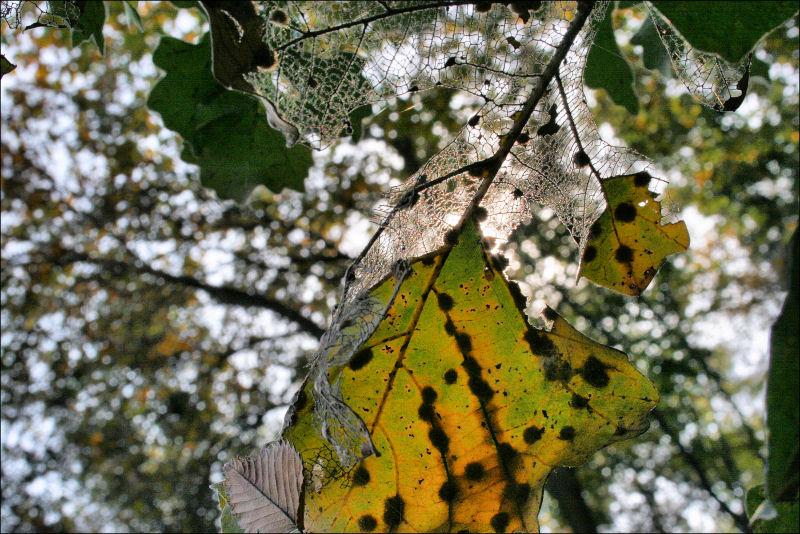
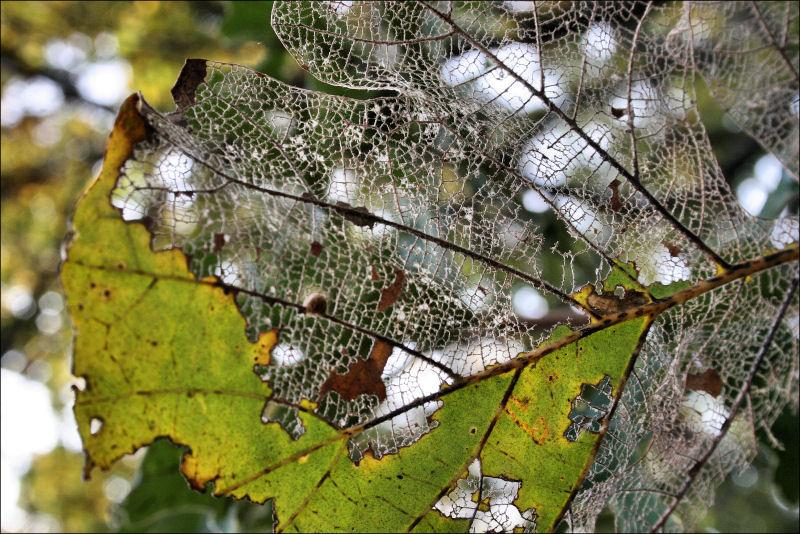
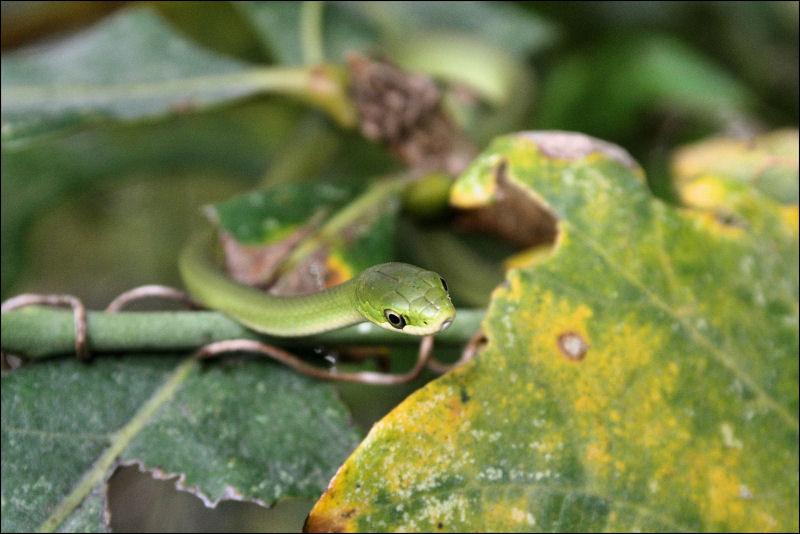
While photographing the filigree on many of the decaying oak leaves in a park forest, leaning backwards with my head in the branches, a little green snake struck out at me, the delicate body about 8″ long and no wider than a baby finger. I wrote to the Biology Dept. at Texas University, and they identified it as a Rough Green Snake – Opheodrys aestivus – it’s non-venomous.
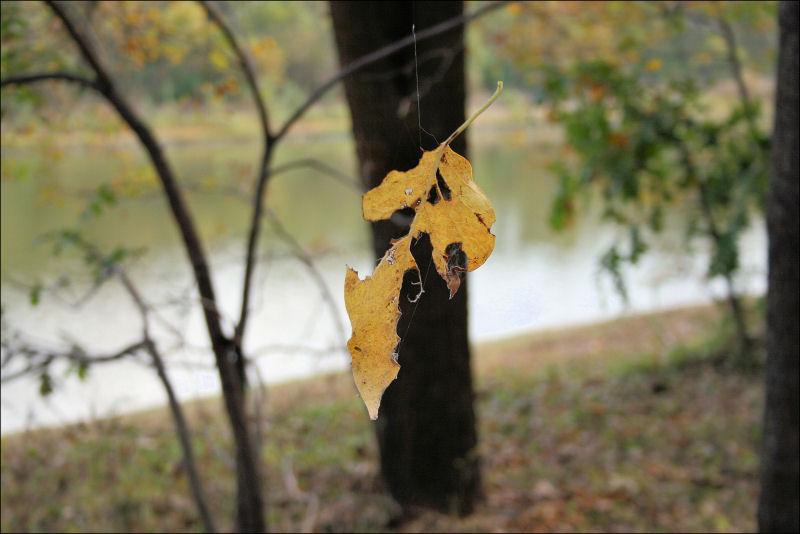
Walking back home completely happy to have chosen that path, expecting no more treasure for the day, a leaf twirled in the breeze, hanging from a spider web strand.
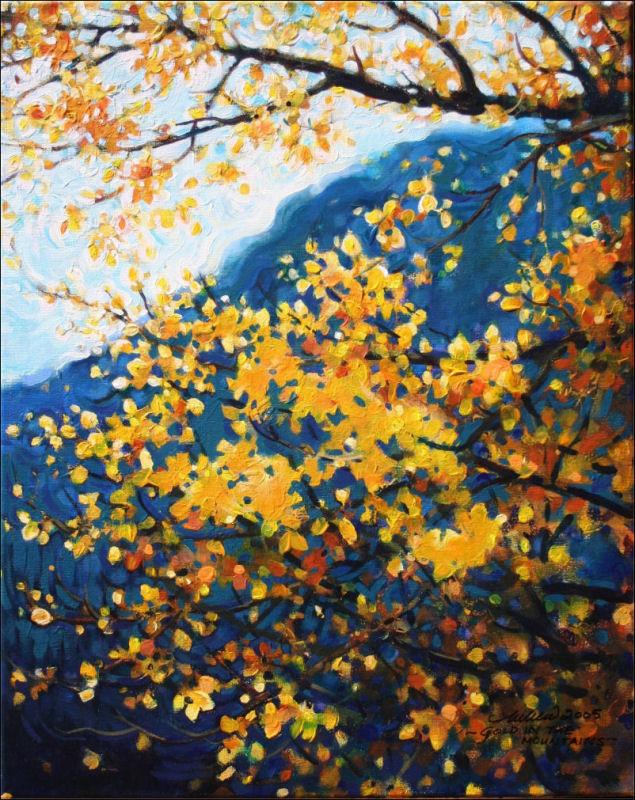
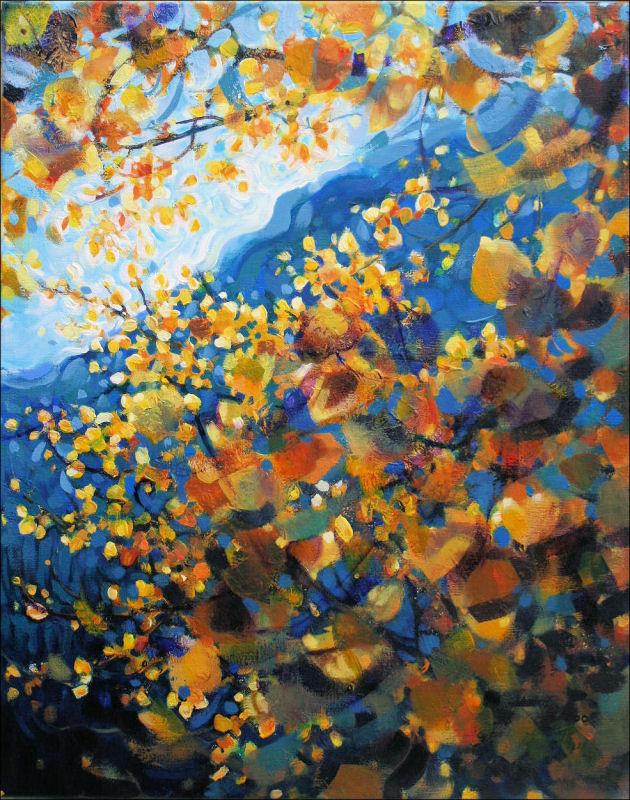
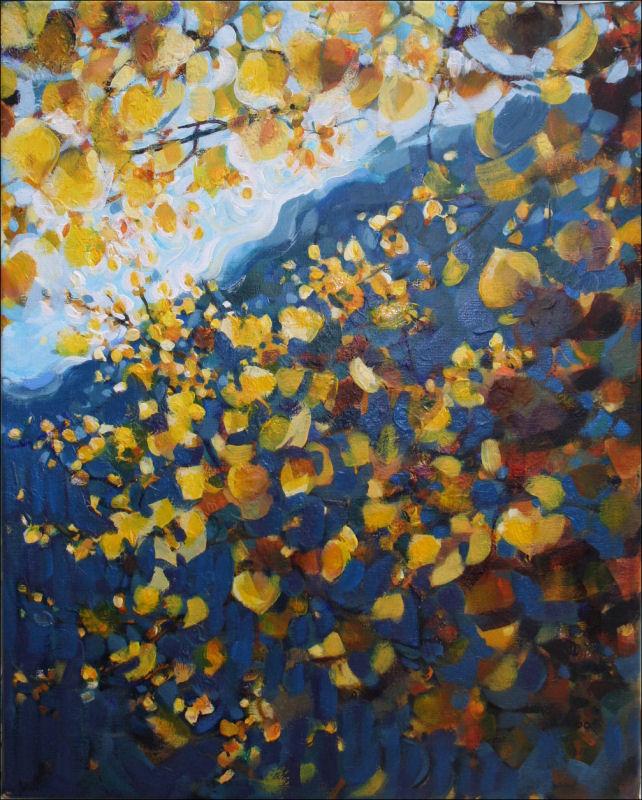
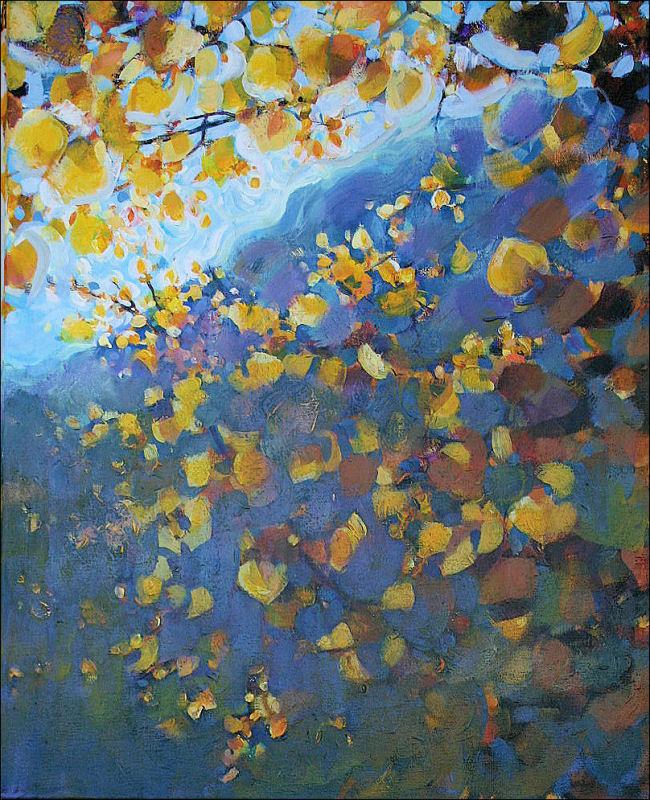
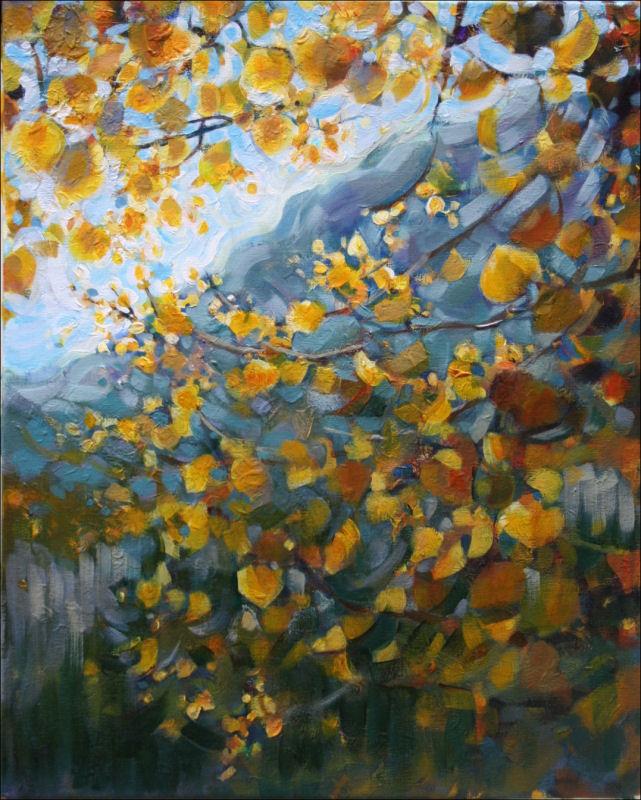
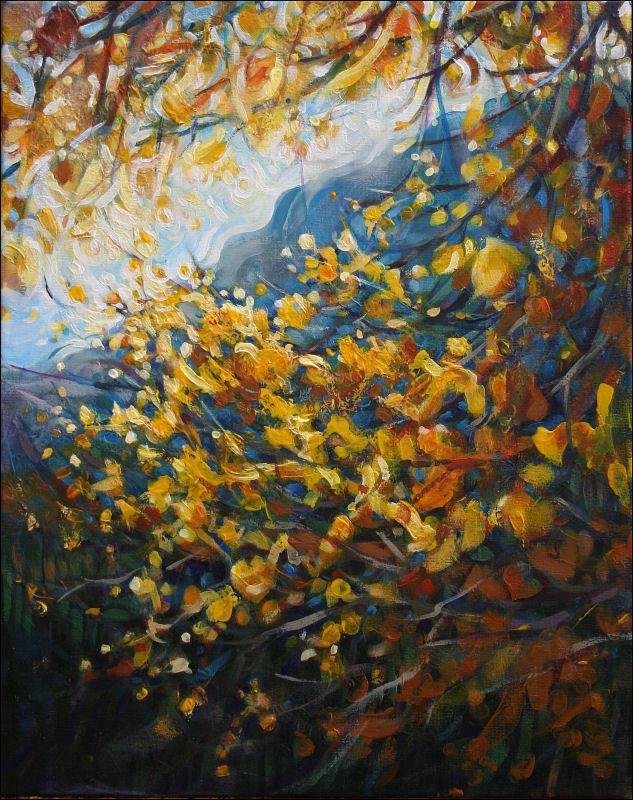
Gold In The Mountains 01
Sunday, November 4th, 2007

Gold In The Mountains 01, finished – 20H x 16W inches acrylics on canvas. Has 28H x 24W inches dark-stained antique frame with gold trim
Started late in 2005, Gold In The Mountains 01 has evolved through many changes to achieve the finished painting above. The first thumbnail shows the painting at a stage where I thought it finished so entered it into Artjury.com’s 2006 Spring/Summer online exhibition. It was accepted, and at the time I liked the larger areas of flat orange-gold, but about six months later I thought the work needed more depth, and the dark branch across the upper portion stood out, so I began a long process of scrubbing off, building back up, scraping and layering paint, repainting, etc. The piece reached a few different stages where it could have been called finished, but I was not entirely pleased, so kept searching. Here are a few stages in the transformation of Gold In The Mountains 01:
 |
 |
 |
|||
 |
 |
 |

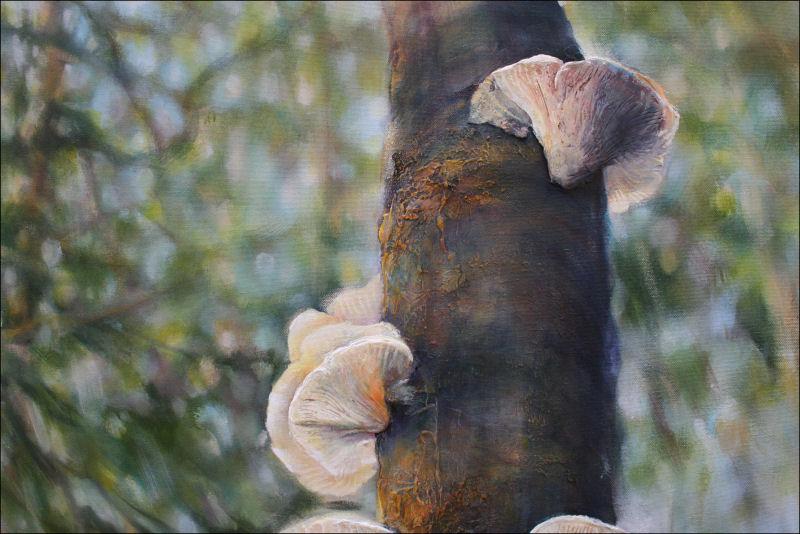
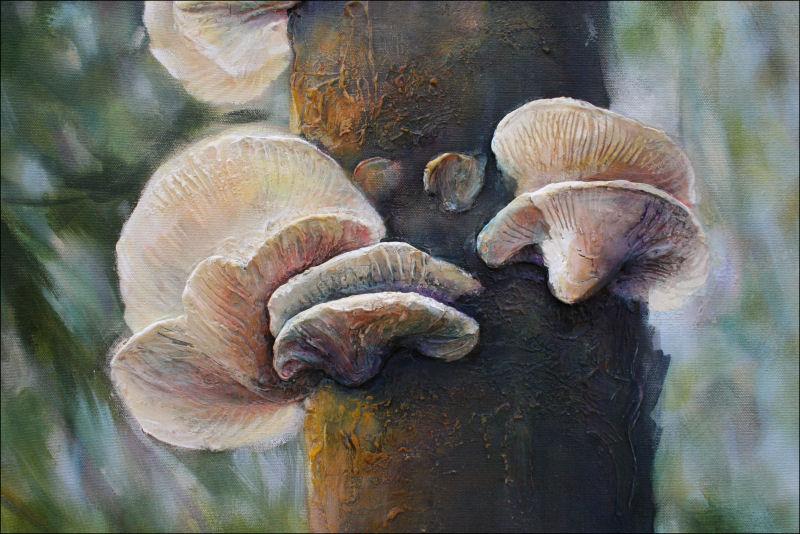
Polypore Fungi finished
Thursday, November 1st, 2007

Polypore Fungi finished – 58H x 41W x 1.5D inches, acrylics, modeling paste, plaster on canvas, wrapped sides painted, narrow frame
One of the goals for this painting was to see if a composition could remain balanced with the main subject offset to the right. With Petra’s suggestion there is more contrast, also scrubbed some paint away for more background to show through.
Mushrooms, bacteria, molds, lichen and other non-flowering plants are lesser appreciated life forms that help maintain the healthy life cycles of forests by aiding the decay and conversion of plant and animal matter into nutrient-rich soil.
‘Tis the season
Tuesday, October 30th, 2007

“Hey Baby, How’s it goin’?”
Changes to Polypore Fungi
Monday, October 29th, 2007

 The 3D fungi idea was fun to try. The canvas absorbed moisture from the modeling paste, so the faux fungi are permanently incorporated and will not fall off. It was carved after drying, being too goopy to manage while wet. The paste was applied then built gradually, dried before applying more, sanded, scraped and carved to define areas. Commercial modeling paste does not sand well, so a tiny bit of plaster helped to tidy it.
Polypore Fungi, work in progress
Monday, October 22nd, 2007

Polypore Fungi, 59H x 41W x 2D, acrylics on canvas, work in progress. Started in June, hung and studied in the loose-phase state; cautious about overworking it. Plans this week: most everything will stay out of focus, with details only on the fungi using a little modeling paste to sculpt. Modeling paste is applied in layers, drying in between, becoming permanent and adhered well to the canvas. Applying too thick at once creates cracks and unstable structures.
« Previous Entries Next Entries »