
trees
« Previous Entries Next Entries »What Bigleaf Maples Do At Night
Monday, May 25th, 2009
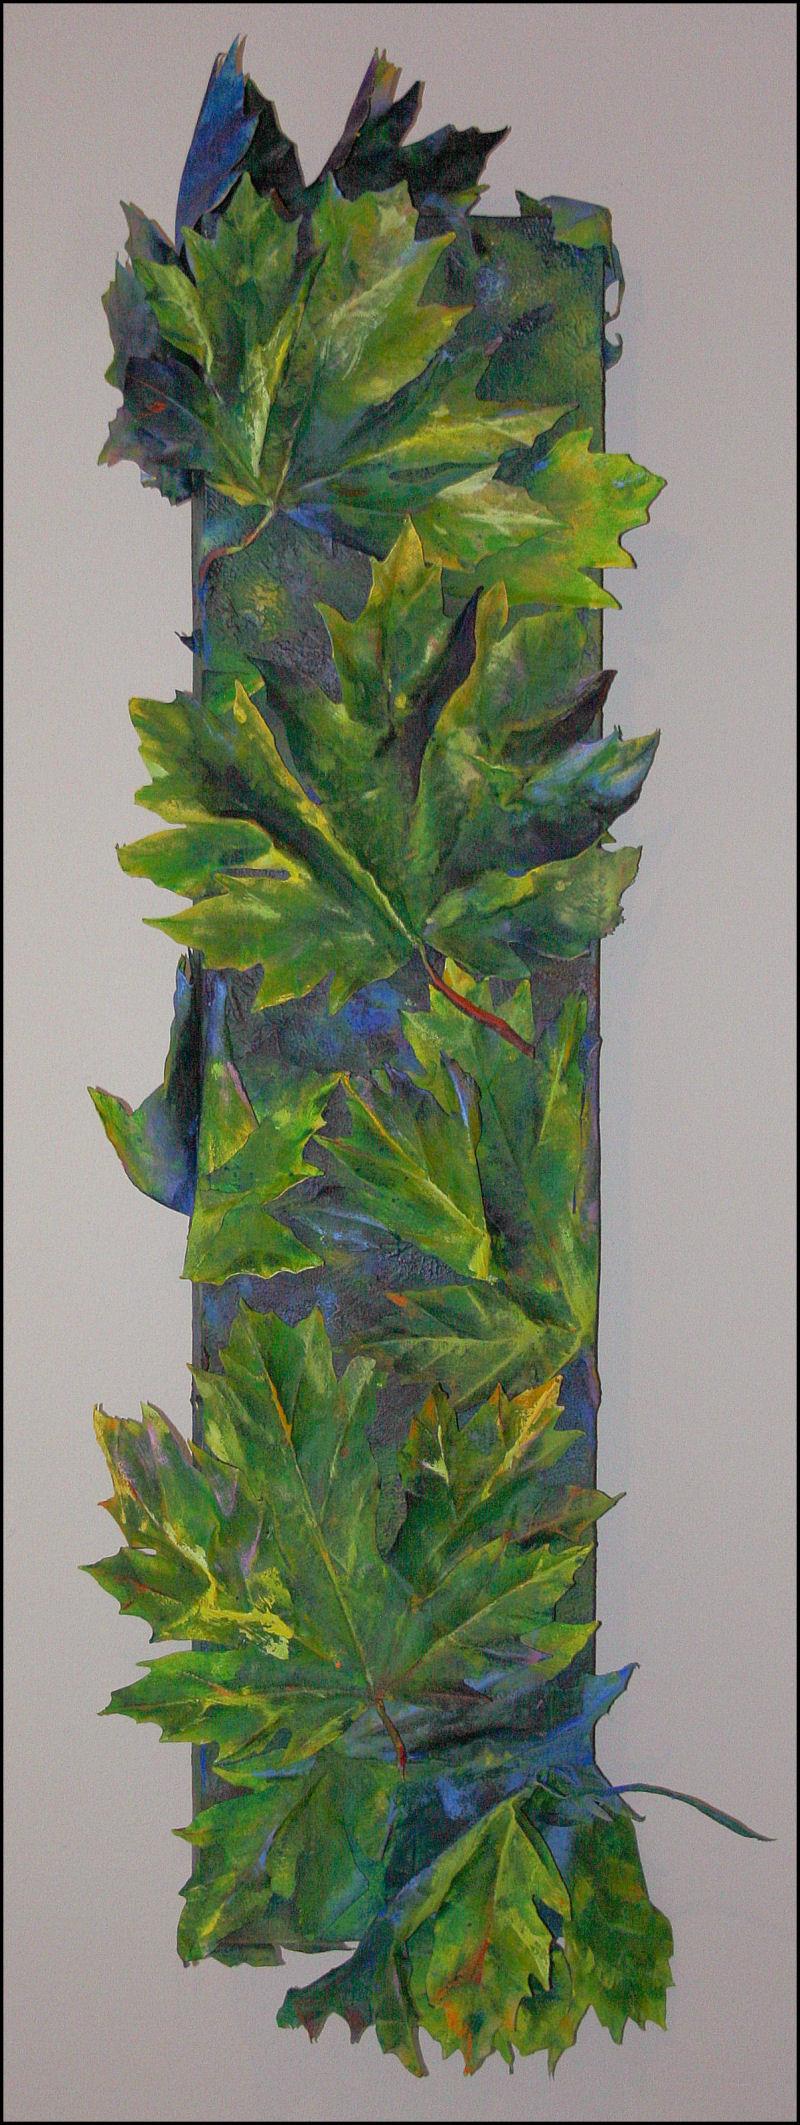
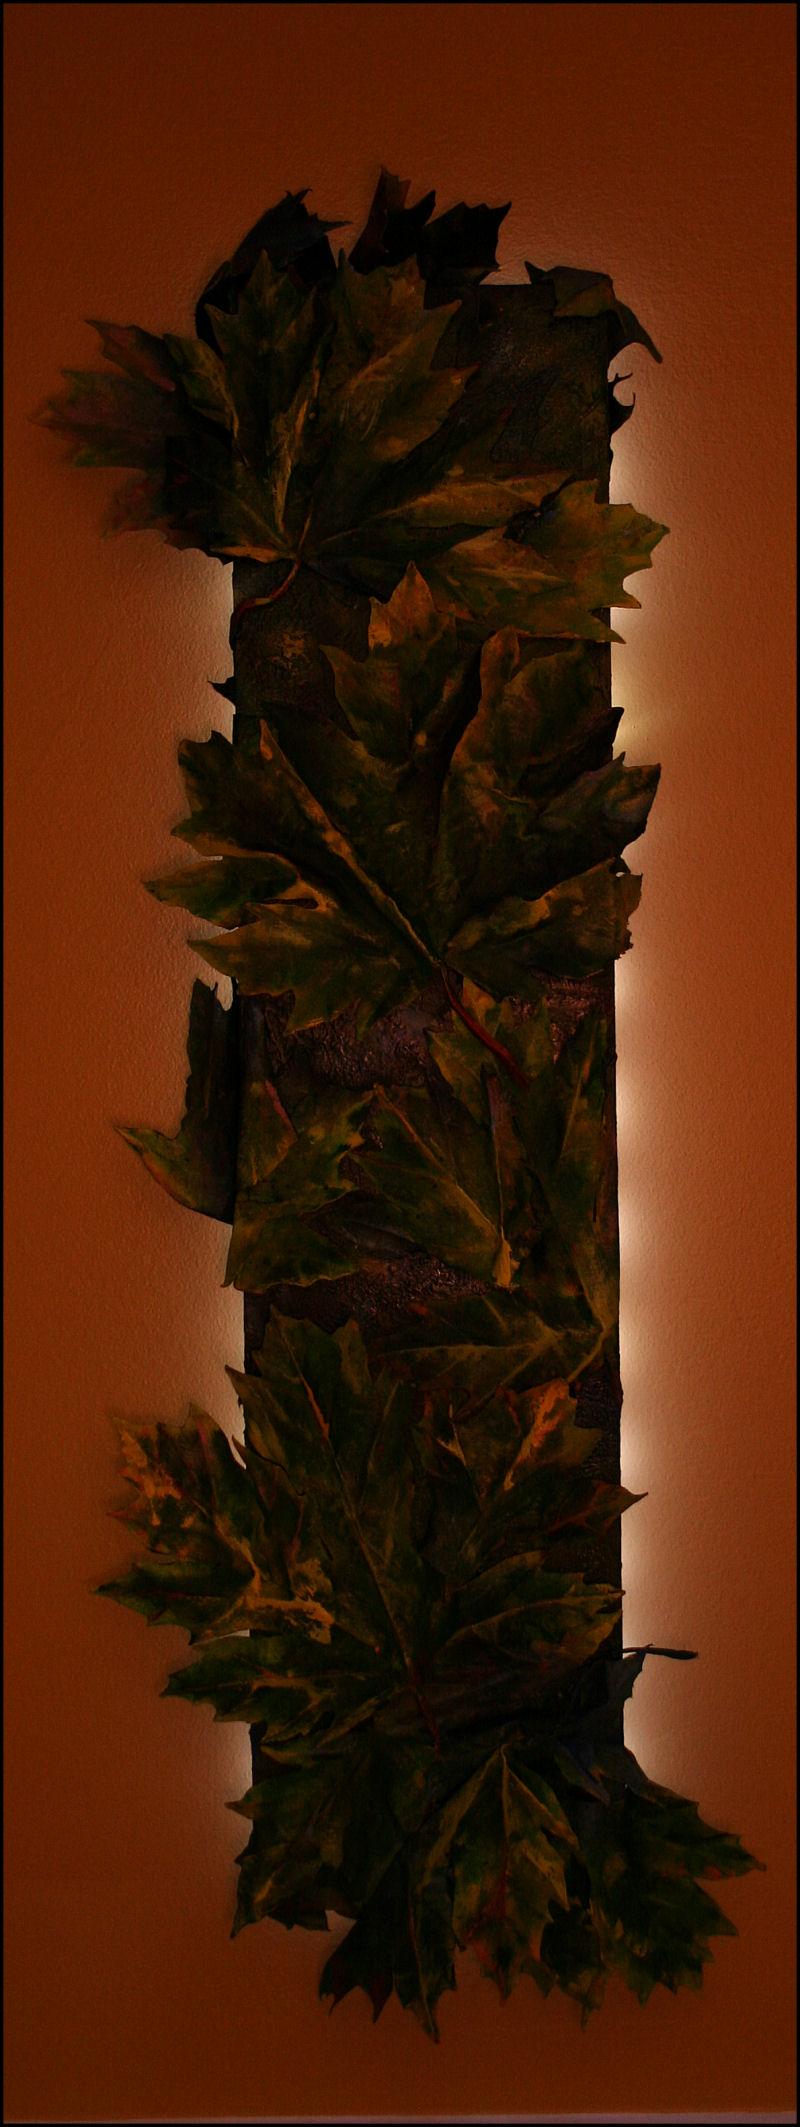
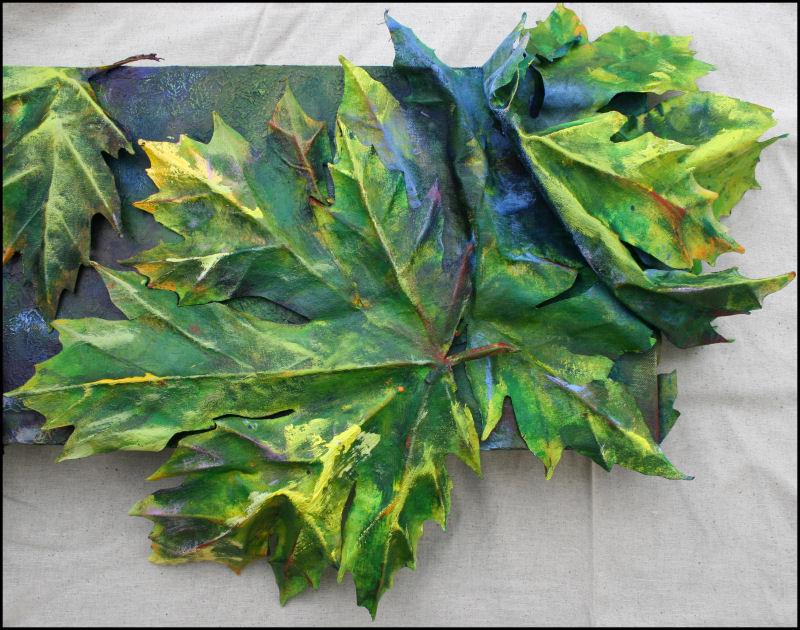
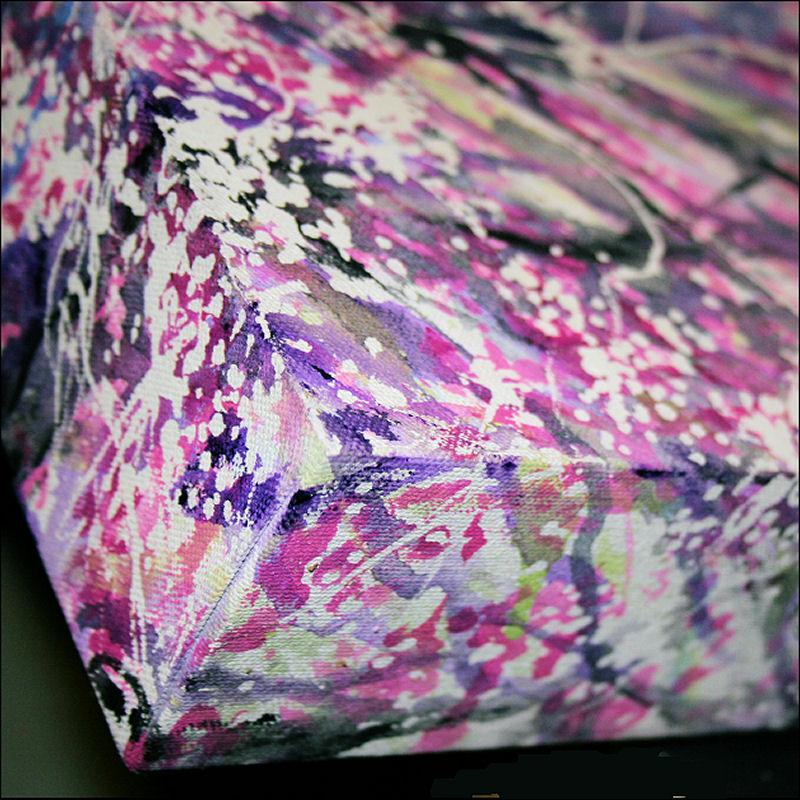
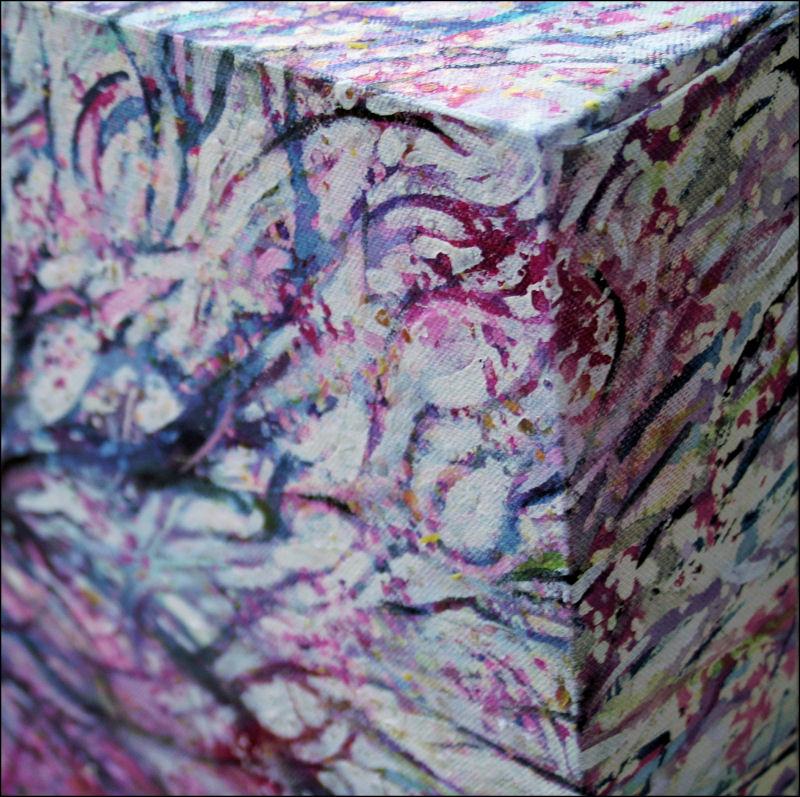
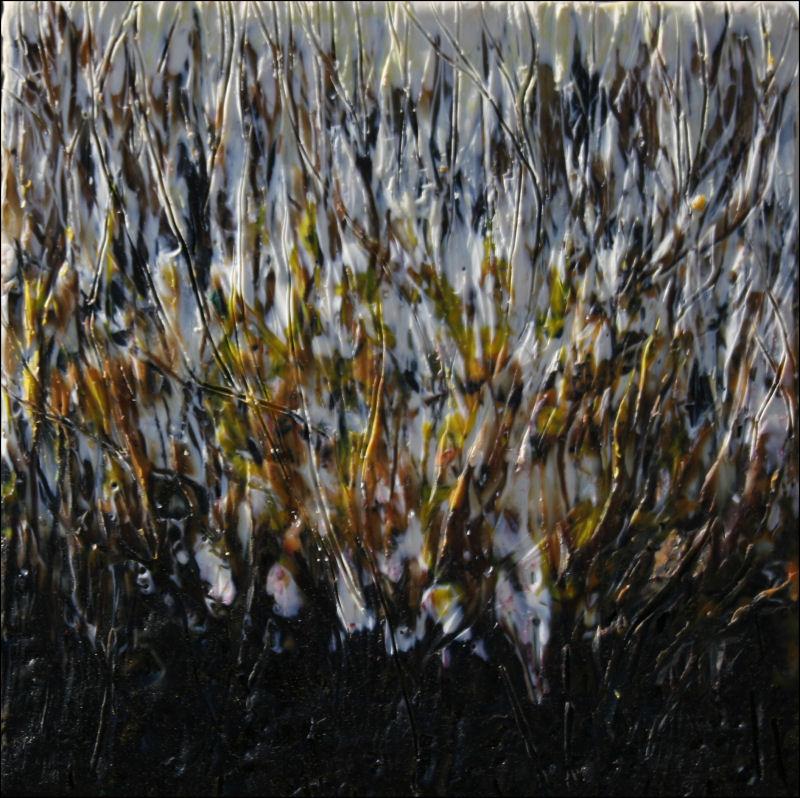
What Bigleaf Maples Do At Night, 57H x 20W x 4D inches muslin, glue, acrylics on canvas wrapped over custom-built stretcher frame. LED light system in back.
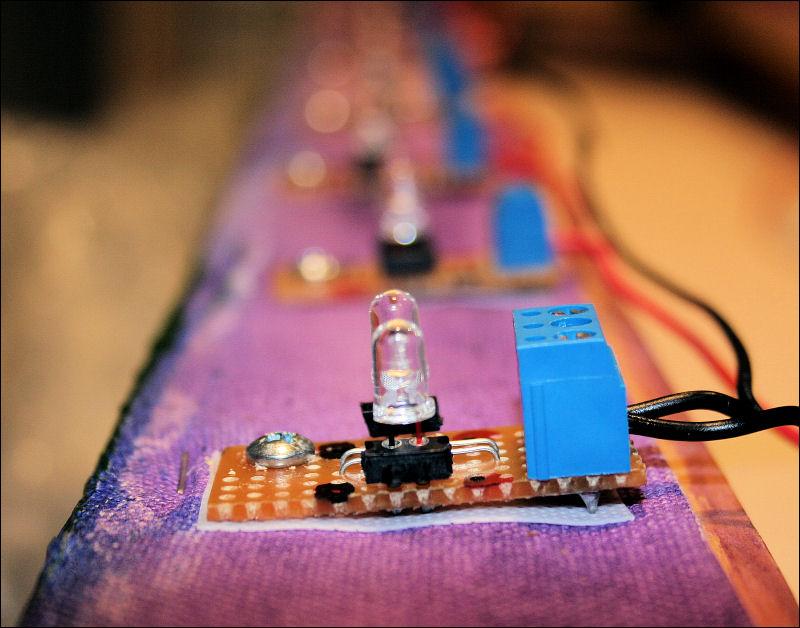
Alain, my husband, signed his name on this also, because he spent the entire week designing, soldering and wiring a system of 30 LED lights for the back. He was not impressed with the eight inadequate push-lights I was initially going to use to create this Day- Night Art. The electric source is a rechargeable 12 volt battery placed neatly in the back, with an easily accessible on-off switch in the lower left corner. He’s not thrilled to ever create another, so it looks like I’ll be learning a little about soldering and electronics, because there are plans to transform the other two canvases exactly the same size as this one. Originally l hoped it could hang in any of four orientations, but that was revised due the battery pack in the back. Thank you Alain for making this piece what it is!
______________________The original blog posts; process:___________________
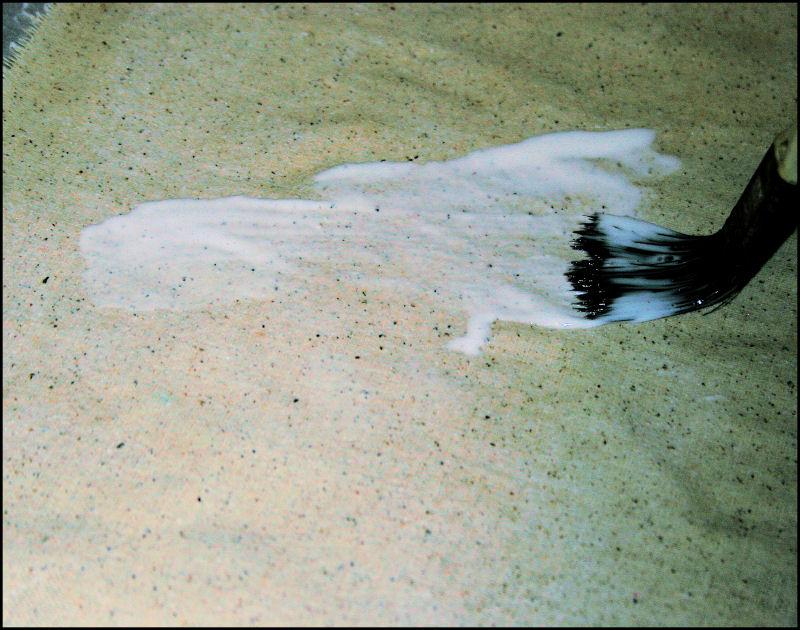
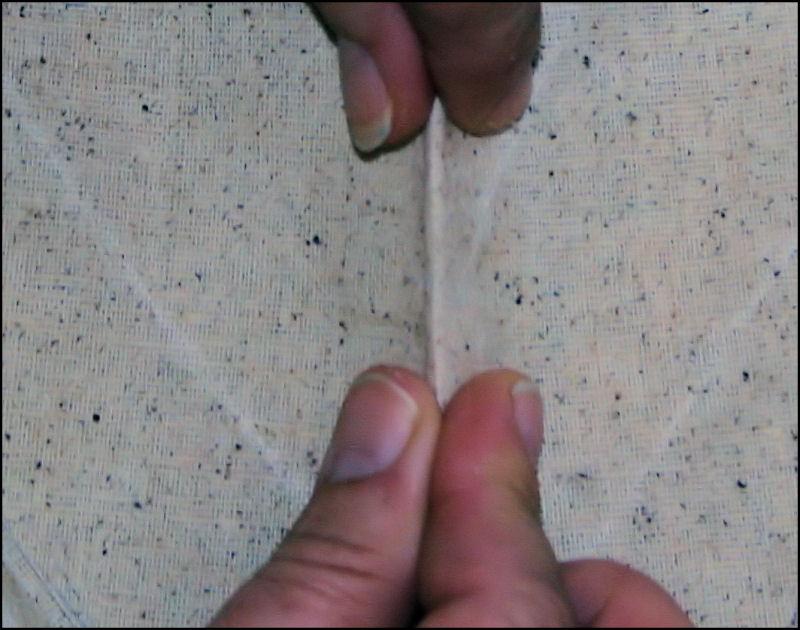
Nov. 17th, 2008: While finishing the final stages of Sun Shower #4, at this point more study than stroke, I’ve started on the next piece… a bit of mystery thrown into this one just for fun. Hint: Step 1 – Unbleached muslin is painted with glue; place over top parchment paper and turn or lift frequently so it doesn’t stick. Nov. 18th: Step 2– When dry the muslin becomes stiff and can be crumpled, pinched and maneuvered to create 3D textures.
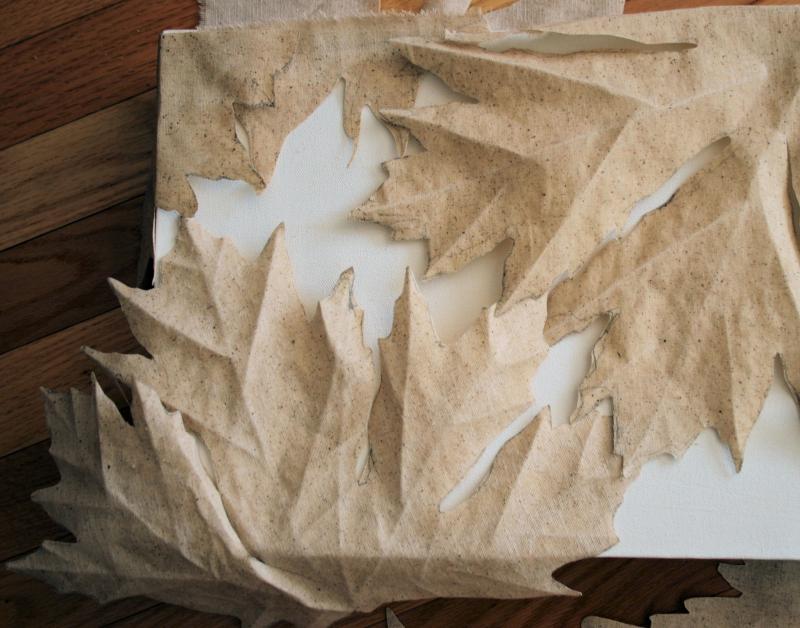
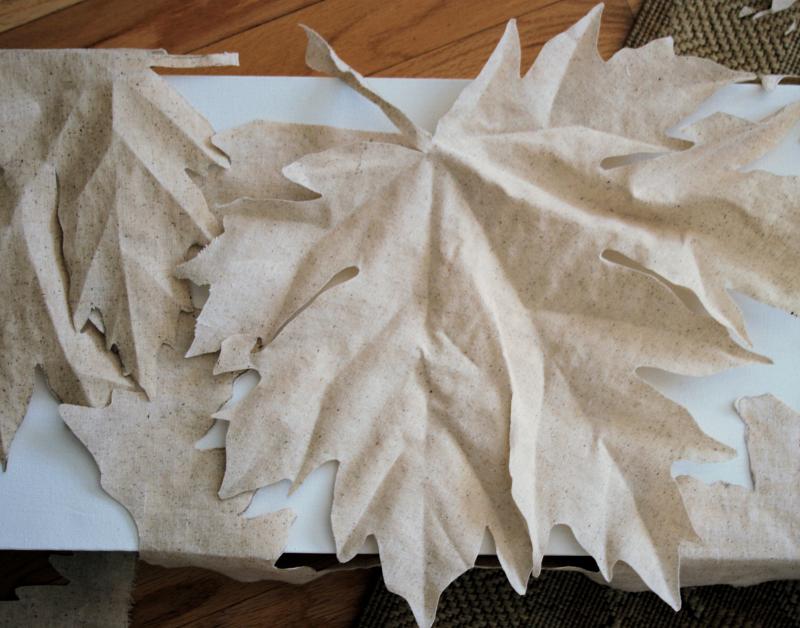
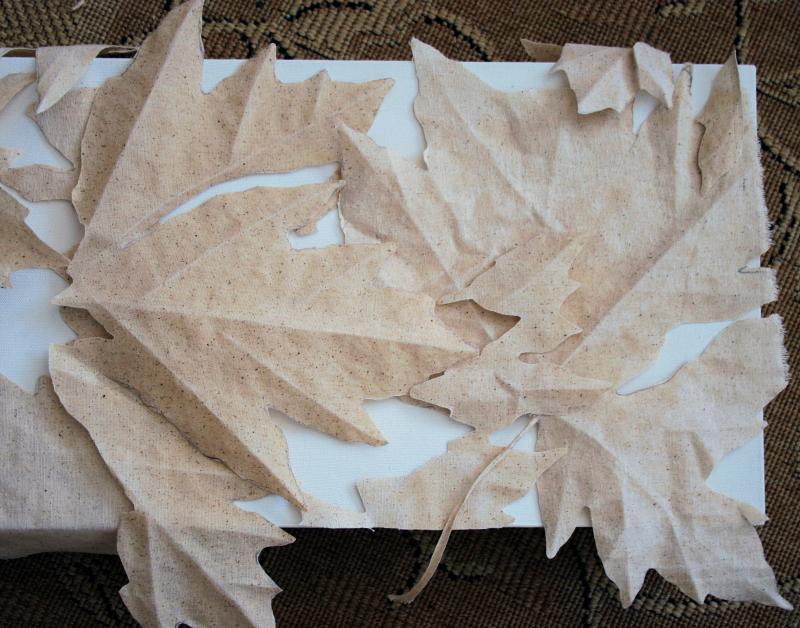
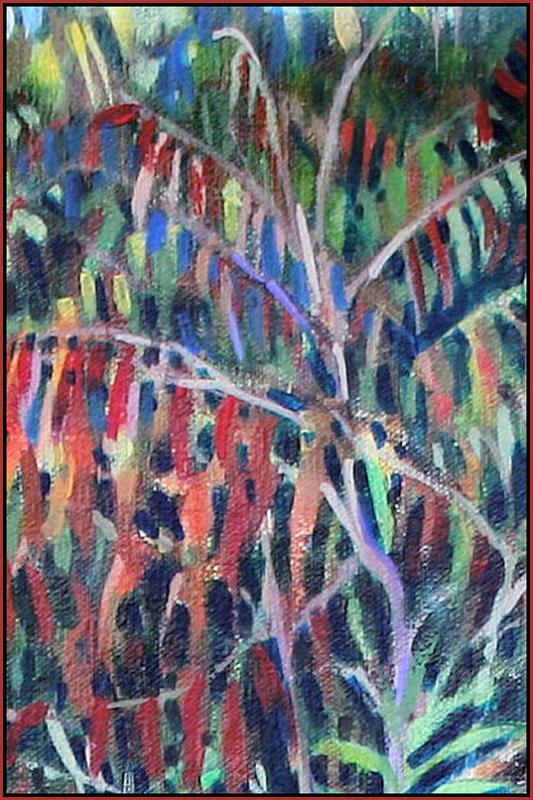
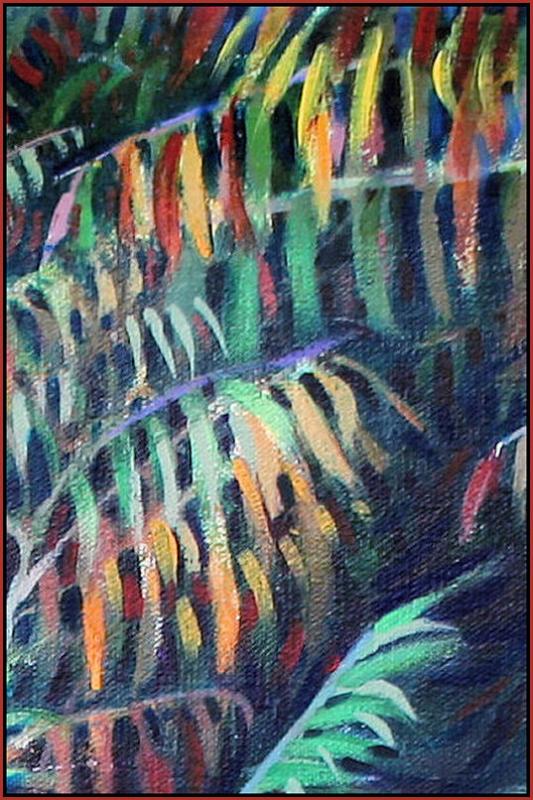
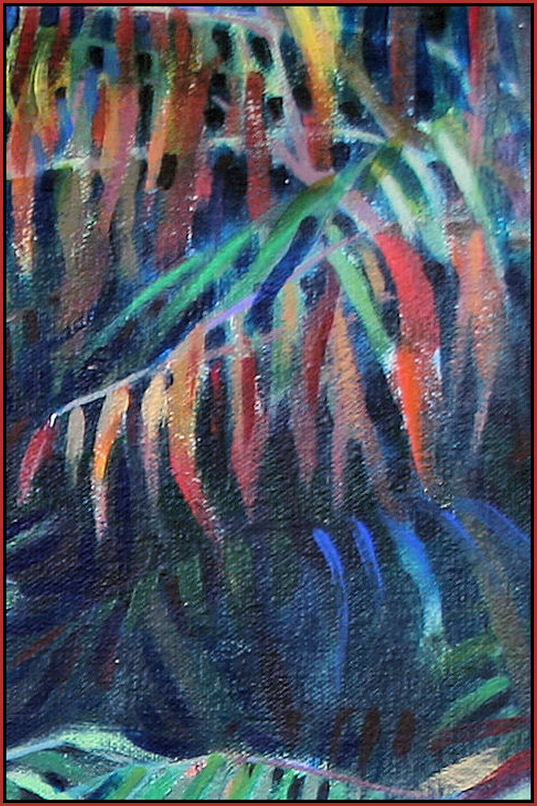
Nov 18th, aft. Step 3 – OK, enough guessing. I have three beautiful sturdy 36 x 12 x 3 inch canvases, hung vertically or horizontally. Each one will have a 3D design of life-sized leaves created with the stiff muslin. This one is of Large Leaf Maples seen on salt Spring Island, B.C. when we were there last summer. They are really this big – about 15 inches across! On these canvases, all dimensional surfaces will be considered; the front, the sides, and possibly some sticking out from the back. Everything will be primed before painting and I love Virginia’s idea to use glue as a resist for the leaf veins. In the above three images the design is still in planning stages.
Nov. 19th – A few thoughts before continuing work: this could be as simple as a sillhouette or painted realistically, still haven’t decided..maybe a compromise of the two, on the abstract side of things. Putting lights in the back could be interesting too, as in the recent Zen Garden #8 but would like to come up with something that does not have a distracting cord.
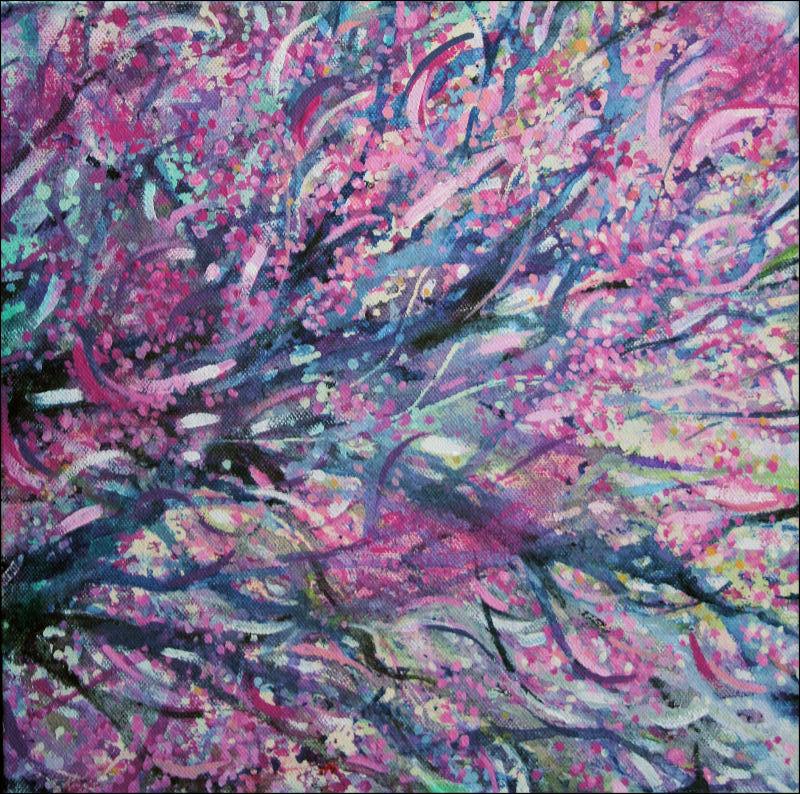
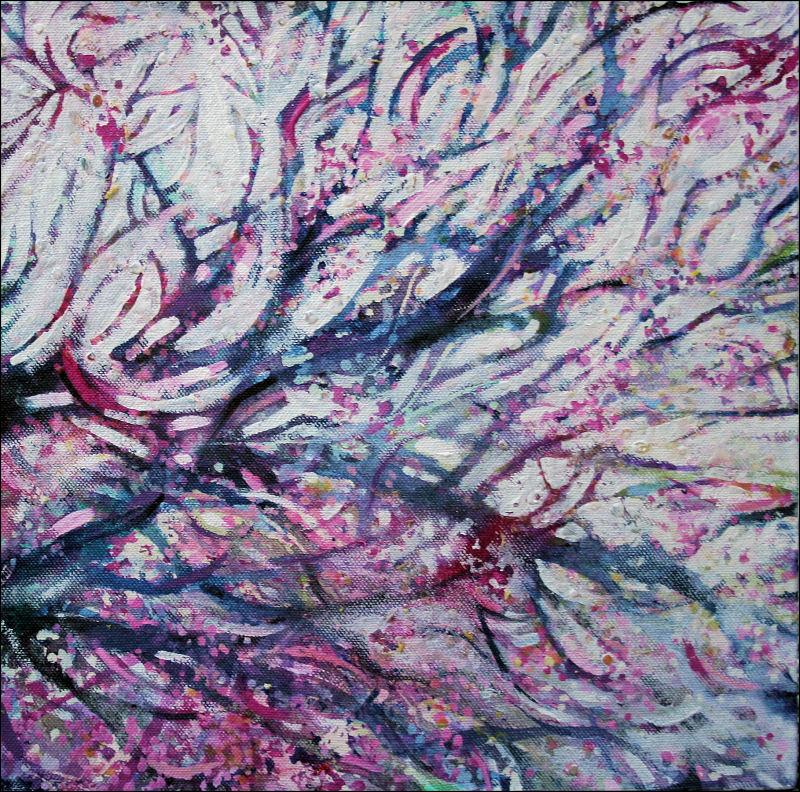
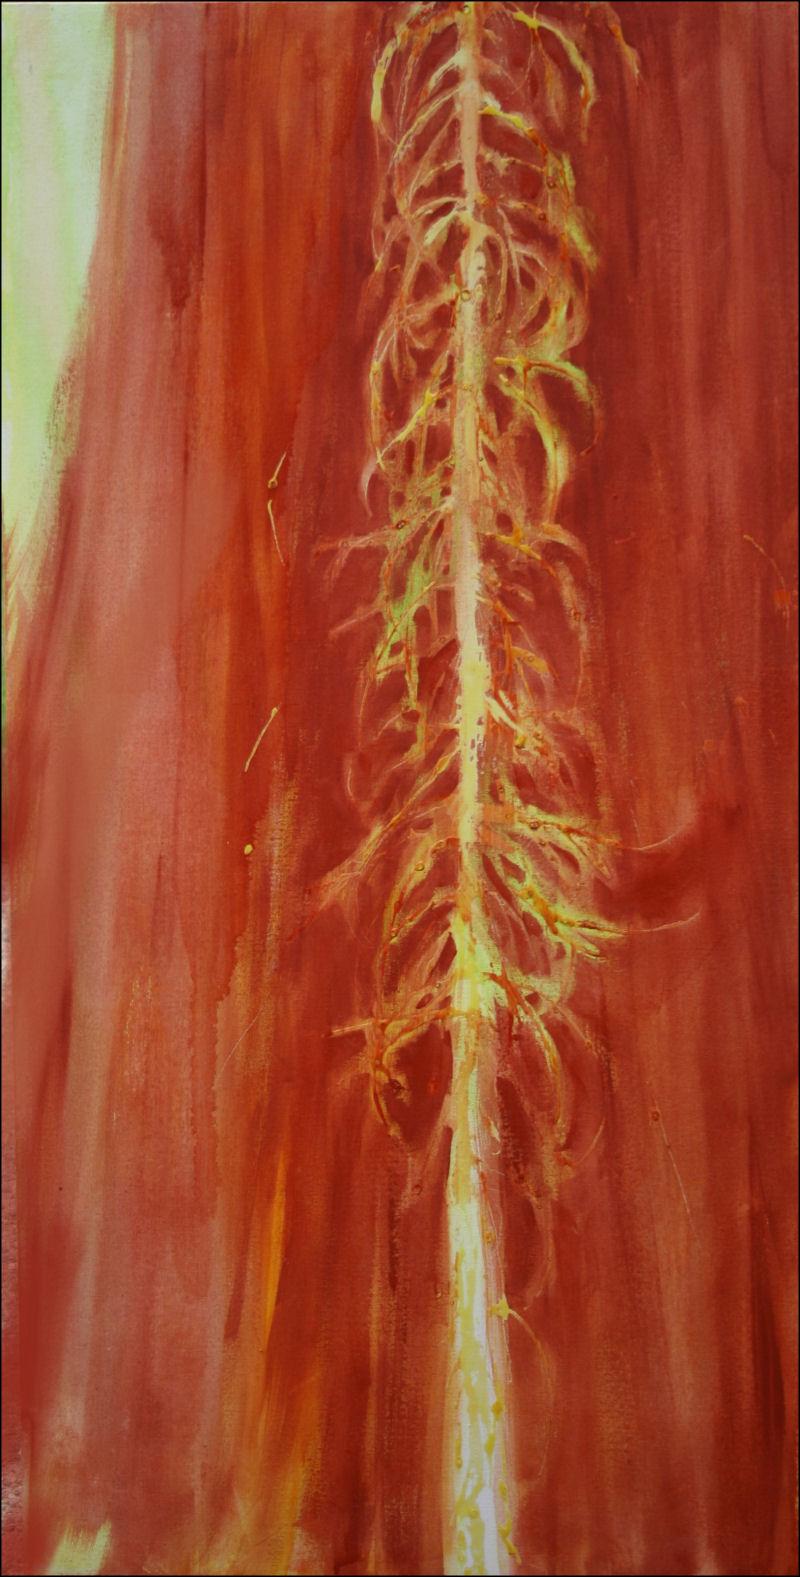
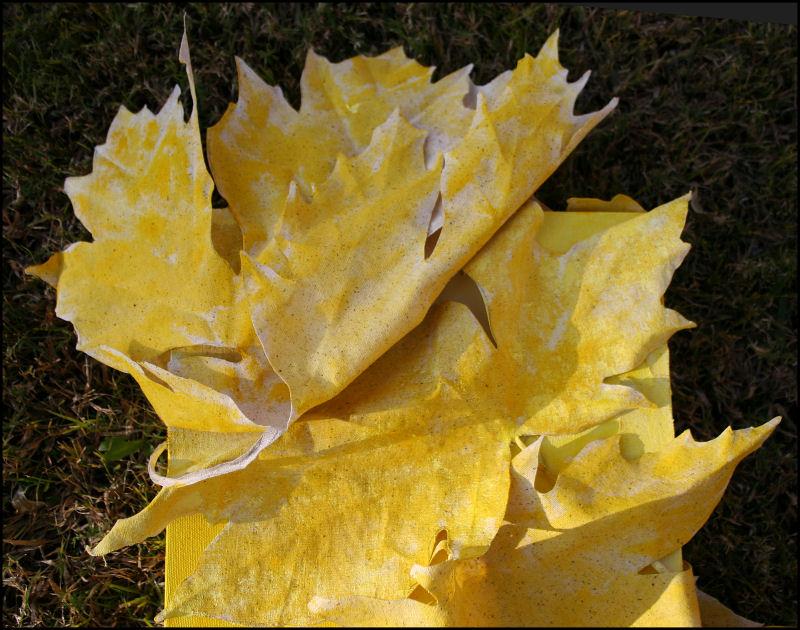 Nov.21st – Seen here, the leaves have a splotchy base coat of Hansa Yellow Deep, a color chosen because when it is so vibrant when it peeks through built up layers of other colors. Now that the entire piece has color though, I think I prefer the sculptural purity of the unpainted sillhouettes better – something to remember for similar work in the future.
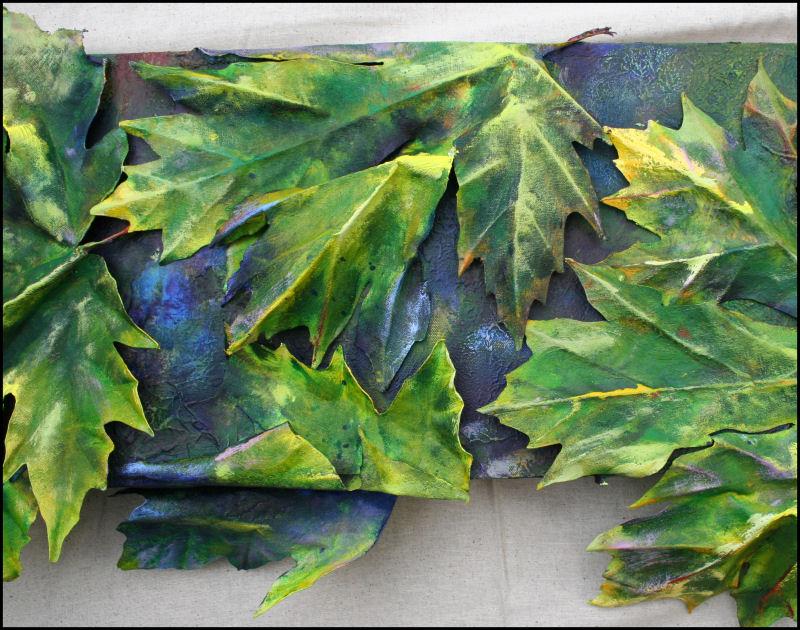
The weight of tinted primer and each application of acrylics makes the fabric limp from of the paint, meaning the creasing process needs to be done all over again once it dries, even on successive layers. Because of this I need to slow down and be more gentle with the painting process also. It’s funny how you can overlook things like that when you are ten steps ahead with anticipation for a new project; things always take much longer than you imagine. There is going to be a lot of stopping and starting with this one, which is exactly how overlapping projects occurs.
Also: looking forward to a day-long workshop tomorrow, learning about Encaustic painting with Deanna Wood. Encaustics is an ancient process of painting with beeswax and natural resins. Not usually a “workshop” kind of Artist because I’m too greedy with my work-time, but this is one of those things that’s best learned from an expert. Am bringing a fabric leaf to the class to see how it could be incorporated and if this entire. Large Leaf Maples piece could benefit.
______________________________
All posts and comments for this piece are now combined.
Submitted on 2008/11/18 at 11:48am
If you don’t want to see the seed bits in the muslin, you can get unbleached muslin without the seeds.
_______________________________
Submitted on 2008/11/18 at 1:03pm
OK Lynda, thanks for offering this valuable tip. With regard to what’s in mind for this project, the rawness of the fabric will provide extra texture, but others may want to know that finer quality muslin is available.
Nikki
_______________________________
Submitted on 2008/11/18 at 1:53pm
Hmmm…looks like a resist process to me. Is it a mask? You are a very adventurous soul!
Virginia Wieringa
_______________________________
Submitted on 2008/11/18 at 2:06pm
Nope, not a mask or resist…at least the glue wasn’t initially going to be used as a resist, but once again I owe thanks for the tip via a viewer’s comment – thanks Virginia! It’s true, glue can be used on anything as a paint resist, usually on wood it works similar to crackle glaze (ask me how if anyone is interested). I haven’t tried that technique on raw fabric yet though and for what I have in mind, painting extra glue in strategic places could produce some interesting effects. Let’s see…
Nikki
_______________________________
Submitted on 2008/11/19 at 1:16am
This is great Nikki. I’ll be back tomorrow to see how this project is coming along.
Jim Drury
_______________________________
Submitted on 2008/11/19 at 4:12pm
Hi Nikki
This is getting really interesting, can’t wait to see the finish project
Elizabeth
_______________________________
Submitted on 2008/11/19 at 7:07pm
Thanks for staying tuned Dad and Elizabeth, I also can’t wait to see the finished project – it’s always a mystery even if I think I know what I’m doing.
Nikki
_______________________________
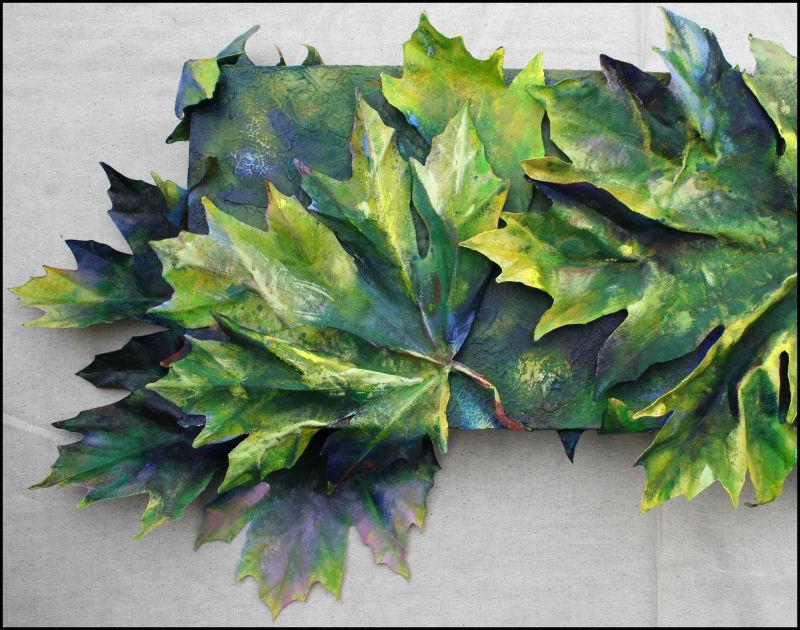
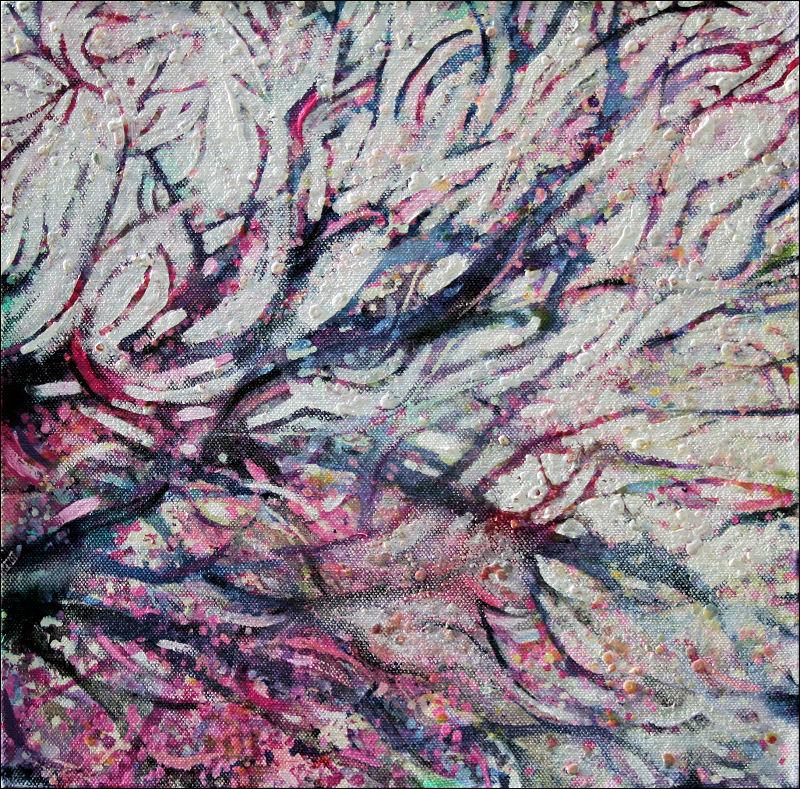
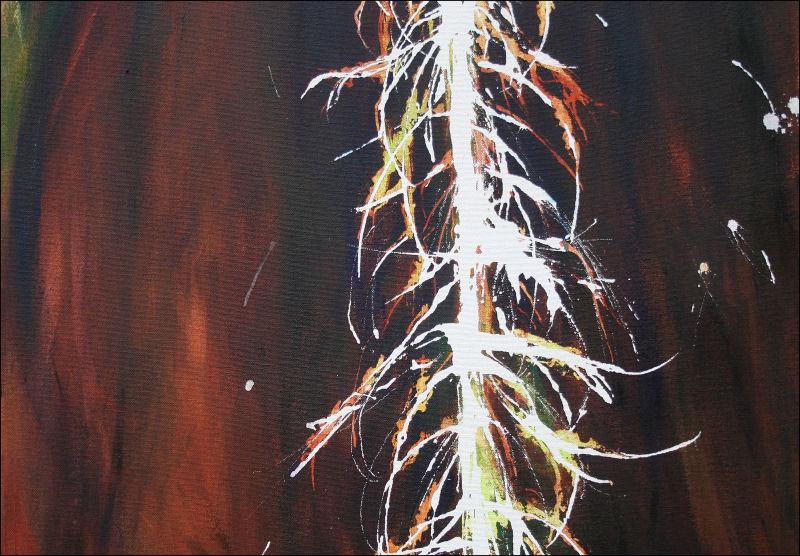
Nov.27: What Large Leaf Maples Do At Night, detail images of 12 x 36 x 3 inches Muslin, glue, acrylics on wrapped canvas. As seen here I imagined the leaves glowing in the moonlight, which took me to the idea of turning it into a piece that can be viewed differently in a dark corner or at night so the sculptural sillhouette shows best.
Since Saturday’s Encaustics workshop I’d like to try another sculptural piece doing the whole thing with 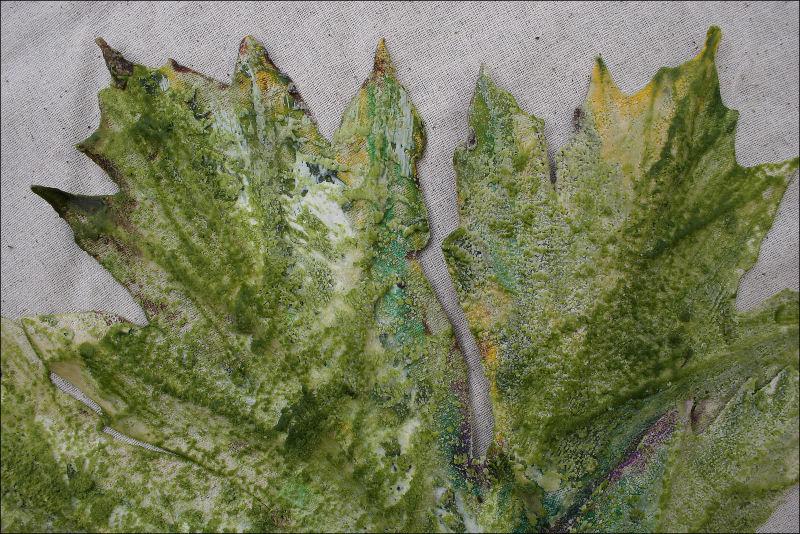 Encaustics tecniques, see right sample. Beeswax doesn’t adhere to acrylics though, so another will need to be planned with that medium in mind right from the start.
Kookaburrahs
Saturday, May 23rd, 2009
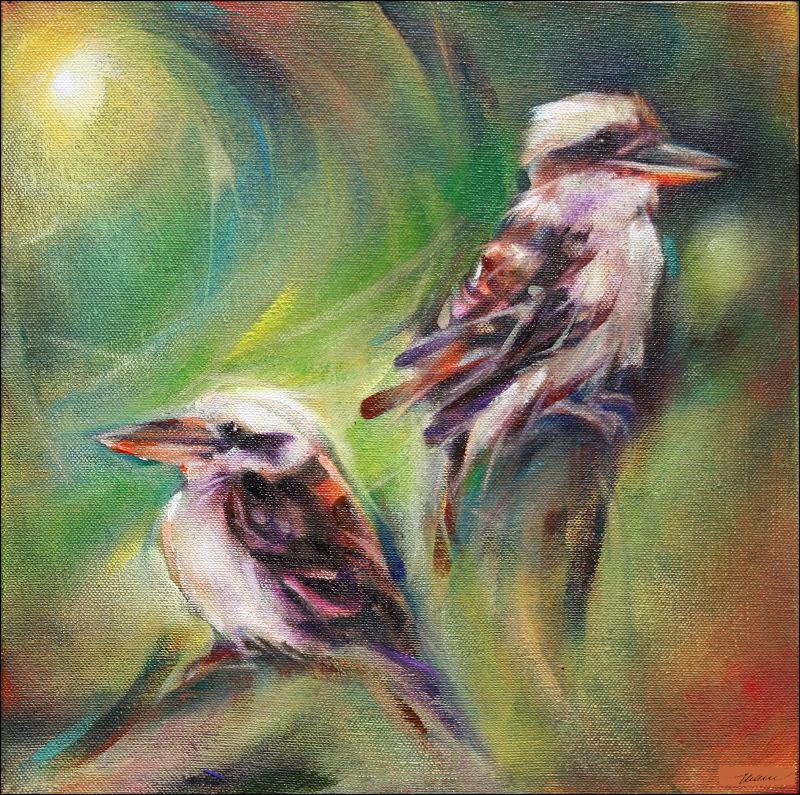
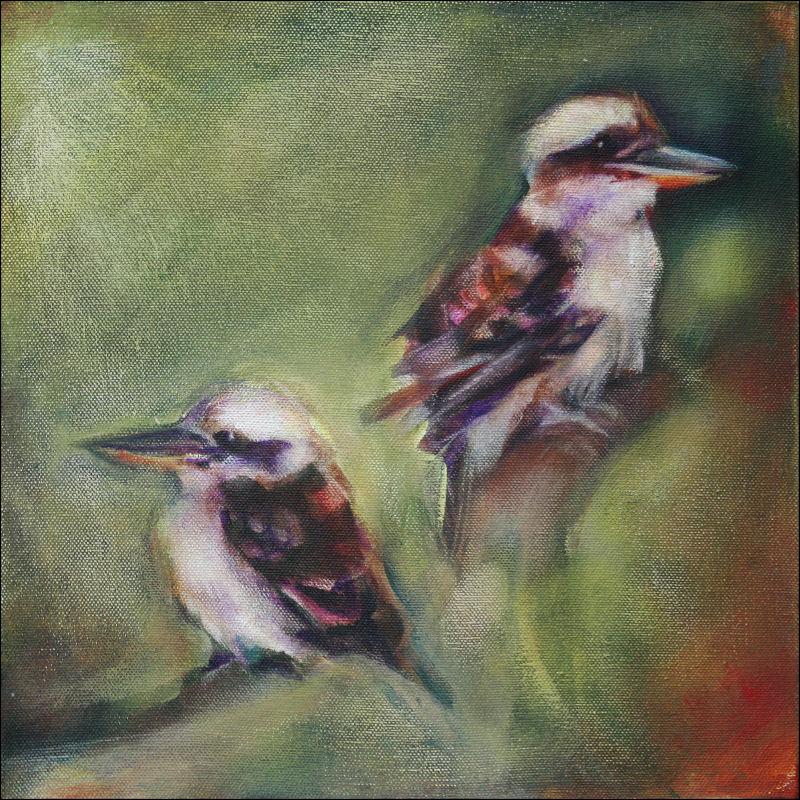
Kookaburras, 11H x 11W x 3D inches acrylics on canvas, wrapped sides painted. Frame unnecessary. Hang on the wall or display on a flat surface. Most of the Magic Square series are signed on the side so as not to impose on the composition. Seen here, the signature is added digitally on the front.
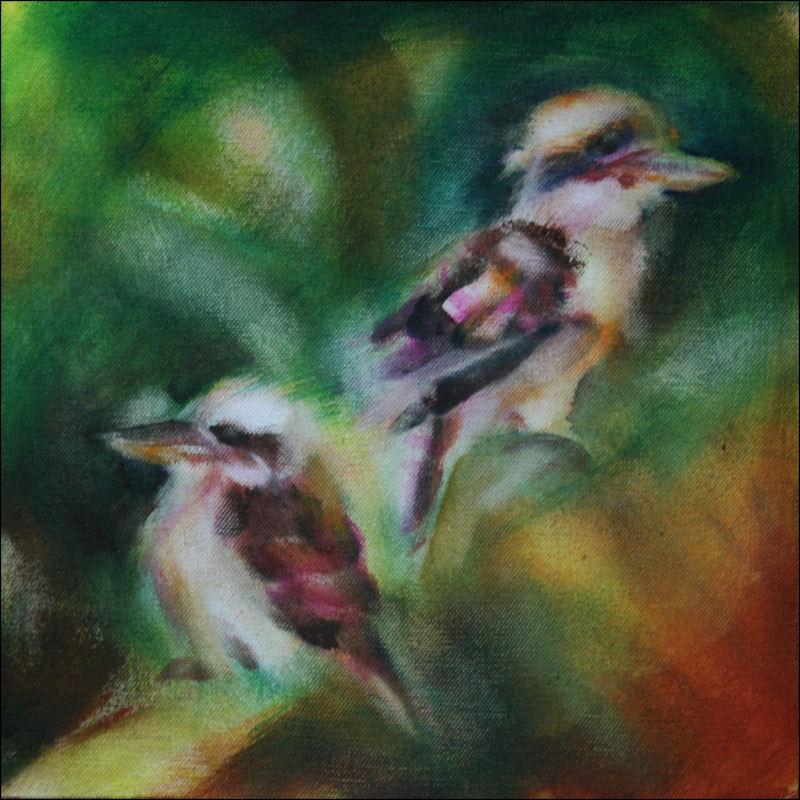
March 13th, 2009 work progress blog post: This painting could have been left at phase 3, but the decision to give the birds more definition and sense of realism created a whole new set of problems. For example, the composition, which was unbalanced from the start, is now exaggerated and more noticeable, so a third element needs to be added in the upper left corner. Not necessarily another object but color or shape that would shift the weight and attention away from the lower left areas.
| Progress details: | |||
 |
 |
||
 |
 |
||

There is a work phase where, once details are added or changes made to one area, every other thing in the picture needs to be brought to the same level of quality: quality meaning style and feeling of the features. I don’t regret proceeding, but it does mean extra effort to solve all the new challenges, and usually while attempting to solve those new ones arise. Other professionals would say this is overworking, but it really depends on what your intentions are as an Artist, and what motivates the work. If risks are not taken sometimes, a painting may never be all that it could be. Phrases we tend to cling to like “less is more” are not written in stone; sometimes more is more…learning is a good thing!
In landscapes details are best left for the imagination, whereas painting animals, birds or other creatures, a purpose needs to be clearer. Is the intention to portray character through shape and silhouette? other traits? specific markings? Is it the main focus or only a part of the whole? Computer tools are also useful in playing with colors and other possibilities.
Sumac Bushes Chair finished
Tuesday, May 5th, 2009
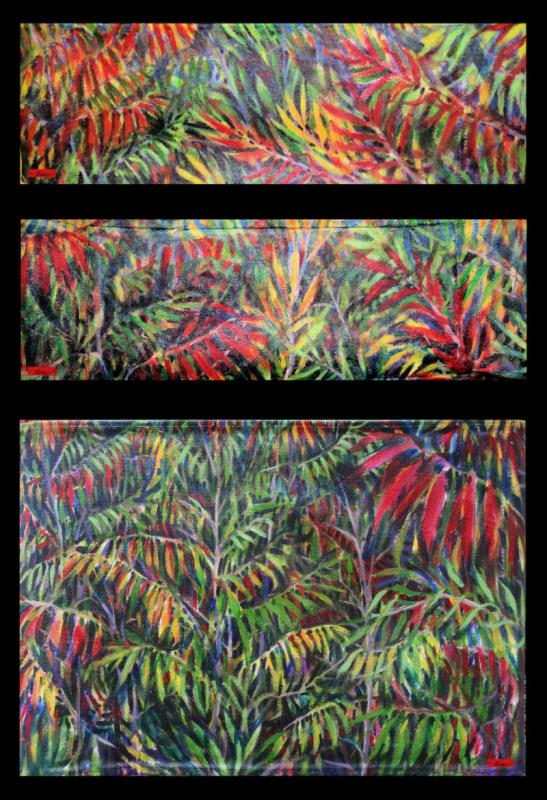
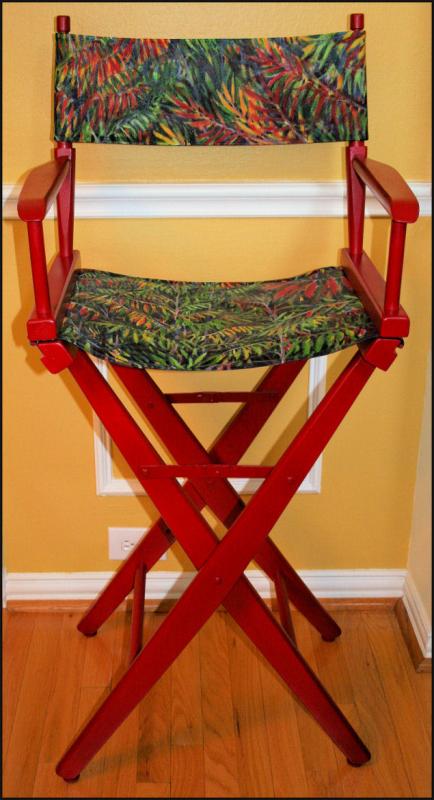
Sumac Bushes, 47H x 22W x 16D inches refurbished Director’s Chair, acrylics on canvas.
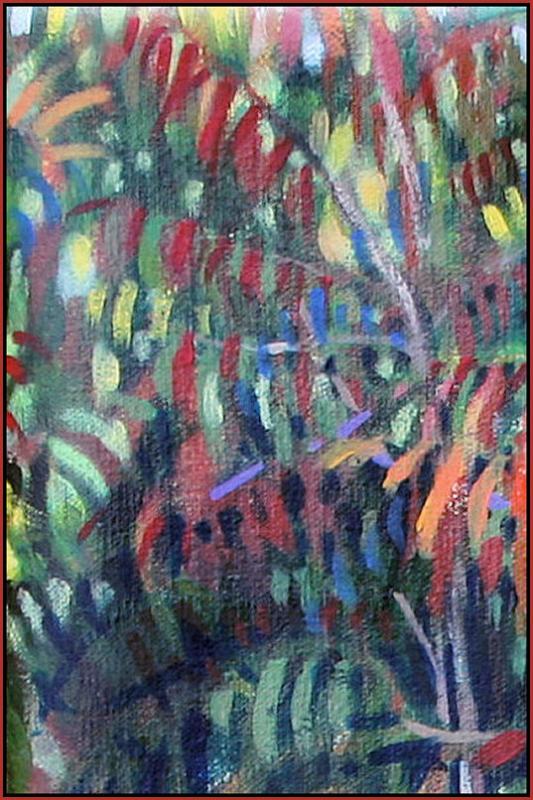
Four cropped pieces of the 1999 painting that inspired this chair hang above it, updated and framed with red narrow plastic w/glass frames. The chair and small paintings are a set.
Fossils Chair, Homage to The Earth – finished
Wednesday, April 22nd, 2009
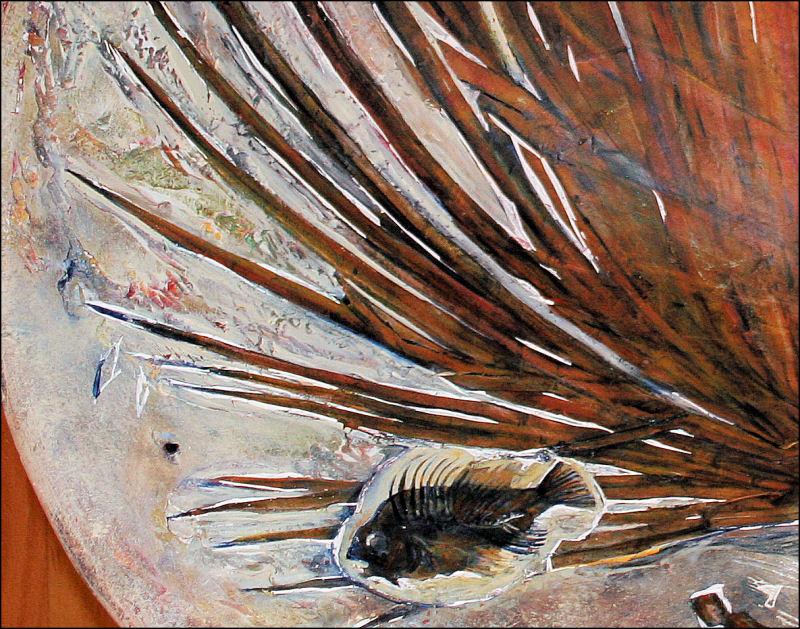
January 12th: While sanding the wood for the Sumac Bushes Chair during coffee breaks, I have started the Fossil Chair, paying homage to the fact that without trees, all life on Earth would not be so prolific, and might not exist at all. Fish and Trilobites are carved into the plaster on the front surface of the chair as well. in this series.
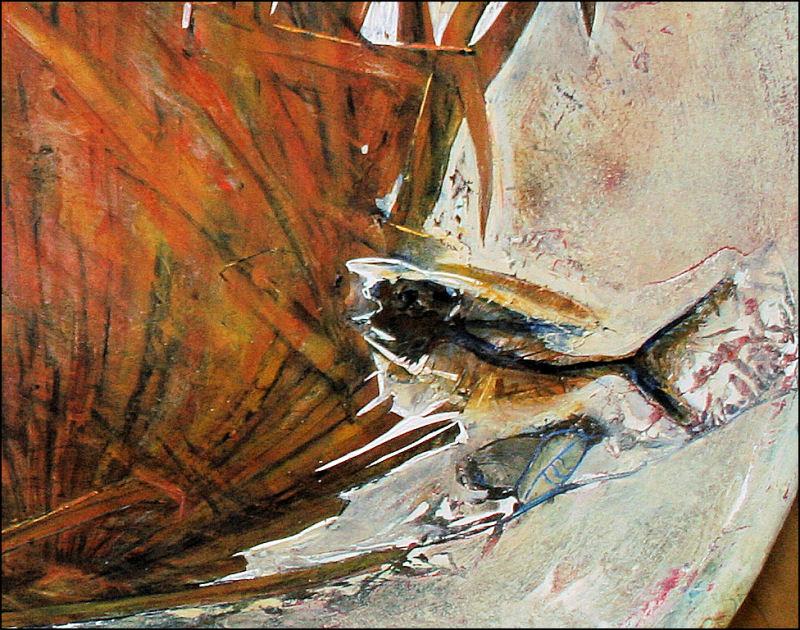
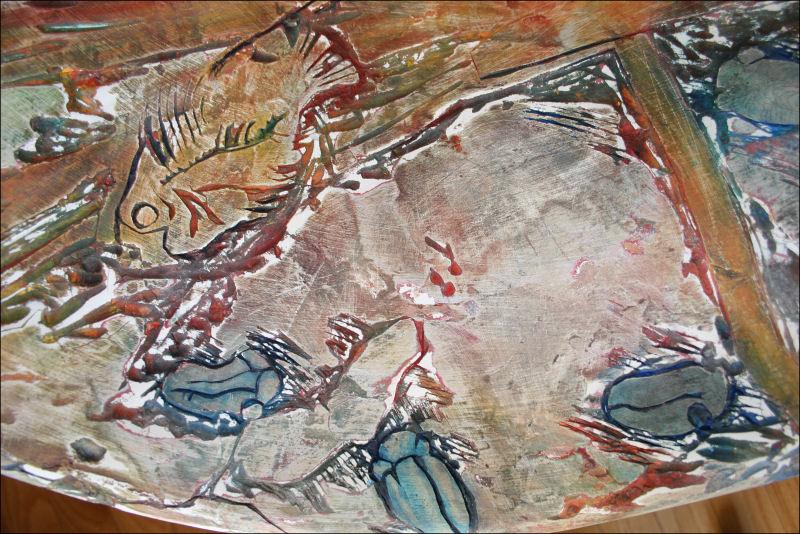
January 13th: Lower detail of Fossil Chair, carved plaster, acrylic paint inlay, sanded. In progress. Trilobites will have painted detail.
Jan. 14th and Jan. 24th updates, below: front details, work in progress on back/underside of the chair. After this stage, all details will continue to be refined with more carving and layers of acrylics. Haven’t done many details on the trilobites yet. The colors in the palm leaf still are too vibrant for a fossil, but are a perfect underlying color because it shows through when layers of blues and black are wiped away with a cloth.
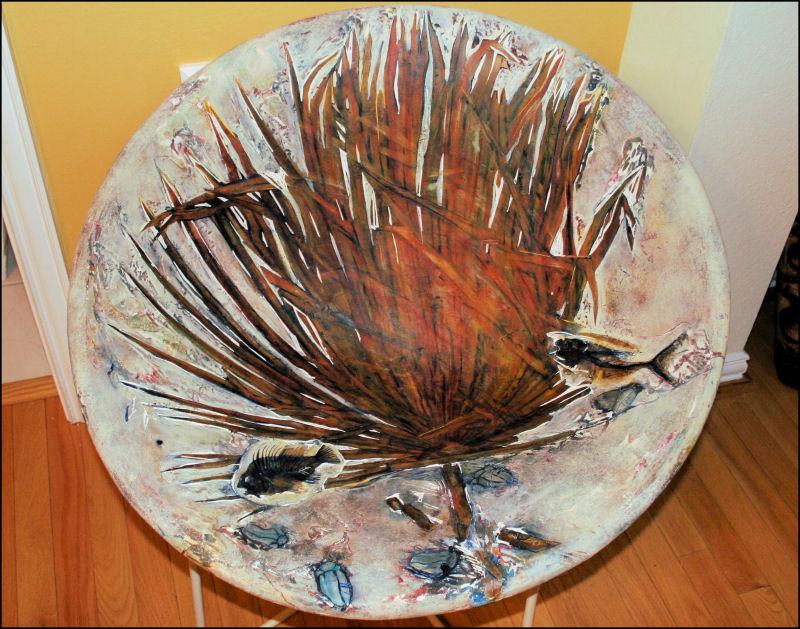
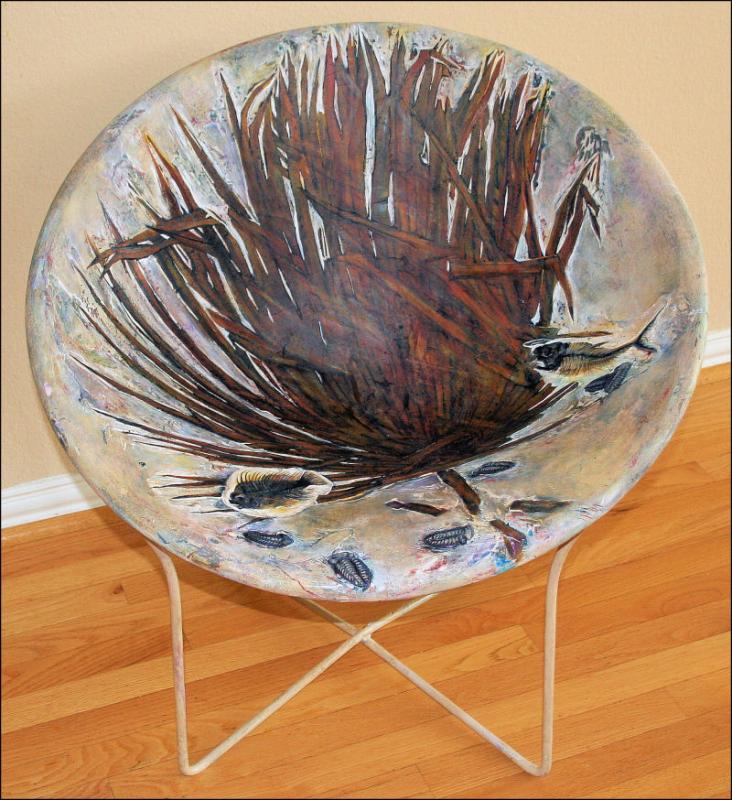
 Fossils Chair, Homage to The Earth, started in January and finished today, except for refining the bark fossil patterns on the back/underside. 29 x 29 x 29 inches refurbished vintage chair, canvas strips, plaster, carved, acrylics, varnish, waxed.
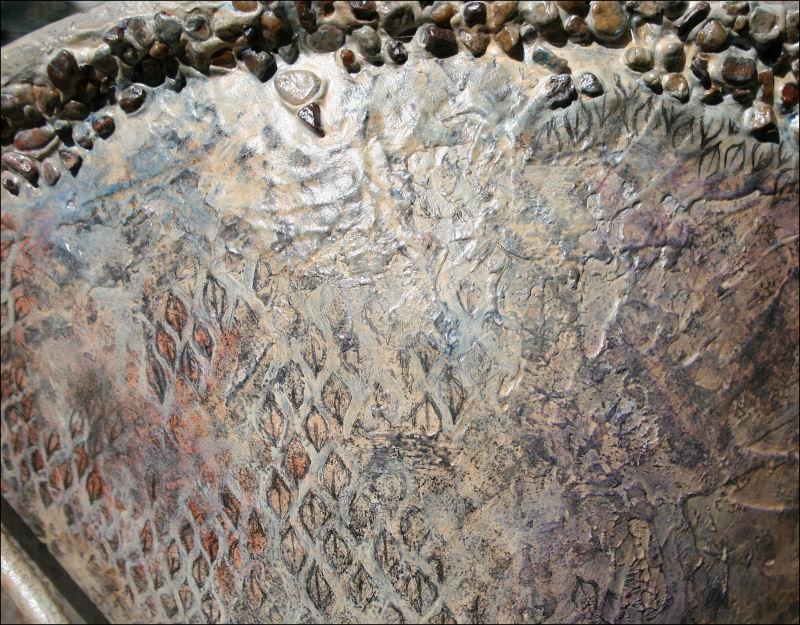
The back of this chair has authentic 225 – 345-million-year-old fossilized clam shells embedded around the circumference. Next, the Encyclopedia Britannica listing. The fossils were found in a mixture of playground pebbles in Dallas, TX.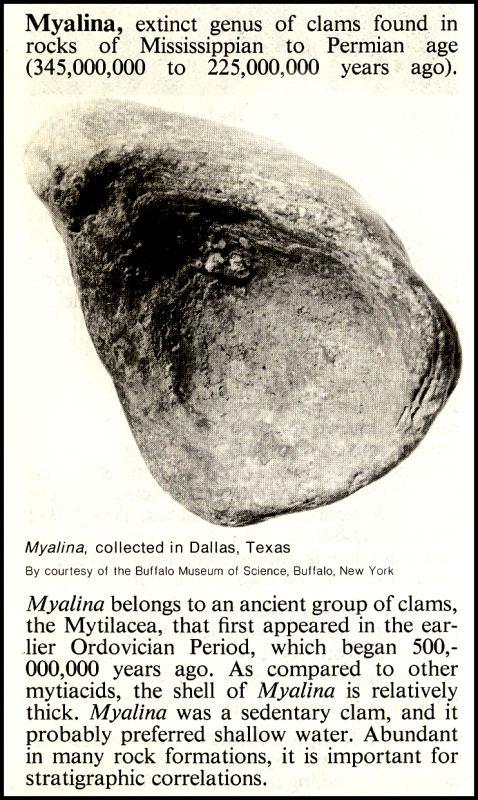
The Cycad leaf fossil replica original was discovered in a Wyoming, USA river basin. Portrayed on the front of the chair is the fossil of a Cycad, the first of palm-like trees that grew about 50 million years ago in a Wyoming riverbed. The first trees on Earth were actually nothing more than woody stems standing in and absorbing nutrients from water. Patterns of fossilized Paleozoic Lepidodendron bark- leaf scars are painted on the underside of the chair. Lepidodendron were a primitive species of the very first trees on earth, reaching heights of 130 feet (40 m) tall around 400 million years ago. Can we even relate to those numbers? That’s what I love about fossils – holding one and contemplating Earth’s timeline is mind-blowing.
| Progress details: | |||||
 |
 |
 |
|||
 |
 |
 |
|||
| Finished details: | |||||
 |
 |
 |
|||
 |
 |
 |
$2,200.00 ![]()
The perfect place for masking fluid
Monday, April 13th, 2009
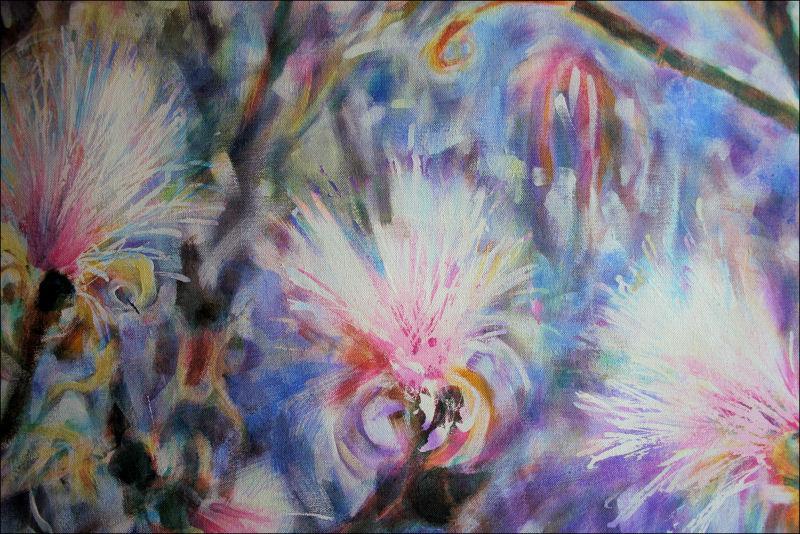
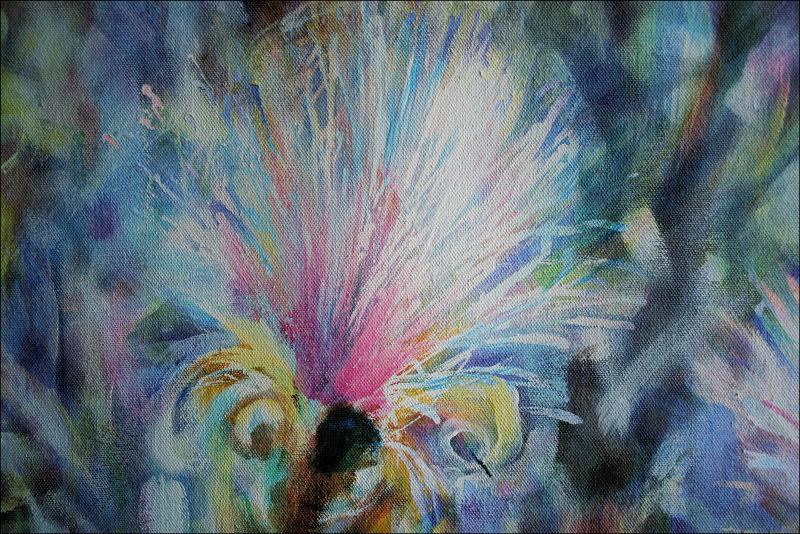
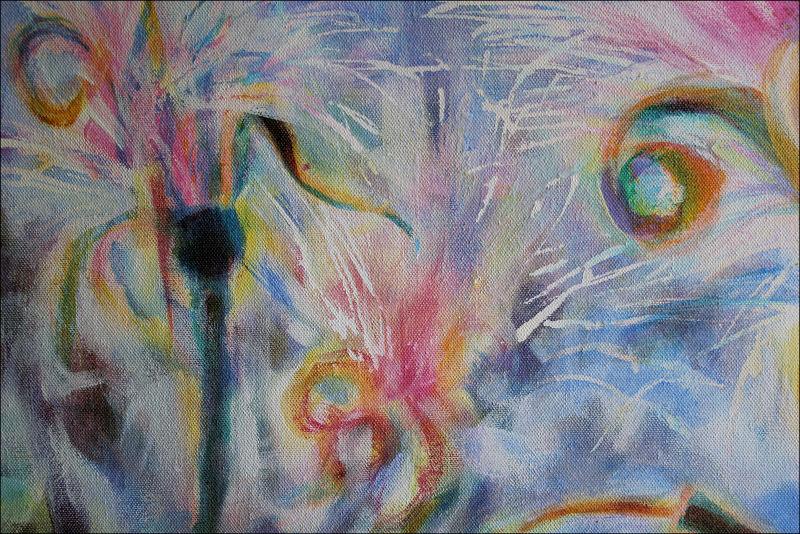
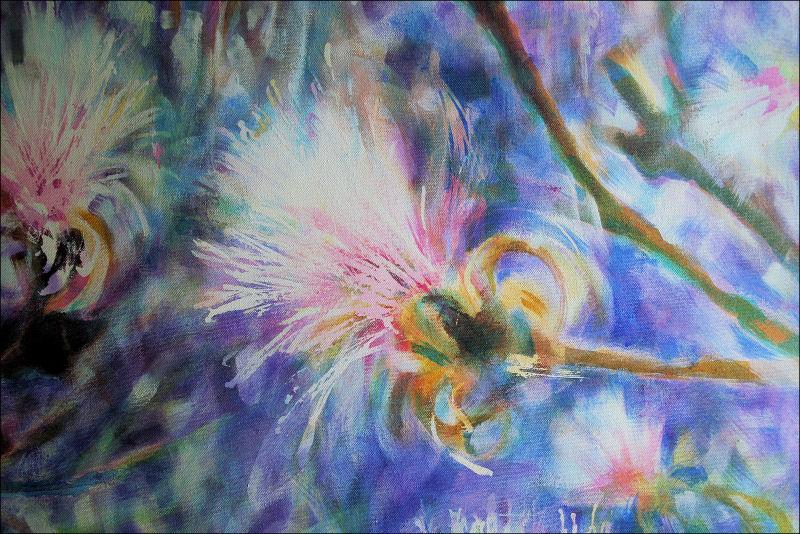
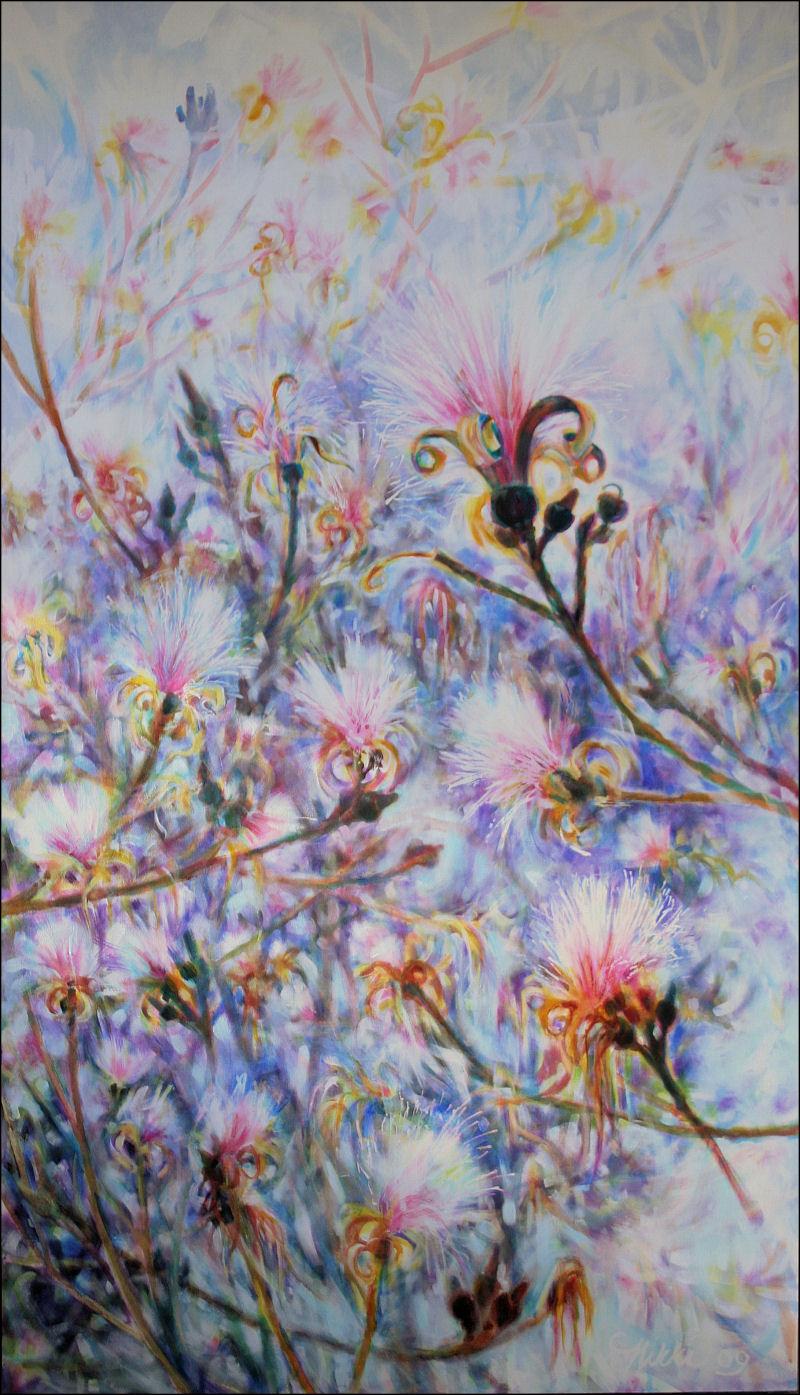 Flowering Shavingbrush Tree, April 11th above: details of 85H x 45W x 3D inches acrylics on canvas,wrapped sides painted, trim frame. Still in progress, but the rubberized mask was removed in order to see exactly what stage things are at before continuing. The painting overall still has a few areas to open up; very little work tomorrow should finish it. Shortly after starting the painting I turned it upside down and applied the masking fluid with a toothpick and let it drip. Gravity can be used as a tool!
April 13th, Left: The top third will still leave as much of the primed canvas as possible; a gradation of unfinished space toward more finished at the bottom. I was hoping to leave it as seen here giving an airy illusion, but it does need to develop along with the rest of it…still not as much, but enough to show the main flower better. This means I’ll be once again dripping masking fluid on the piece upside down to preserve the interesting marks that occurred from the 1st application, and also create some new ones with any further work. For previous posts on earliest progress of this painting click here.
Merging Visions
Saturday, April 11th, 2009
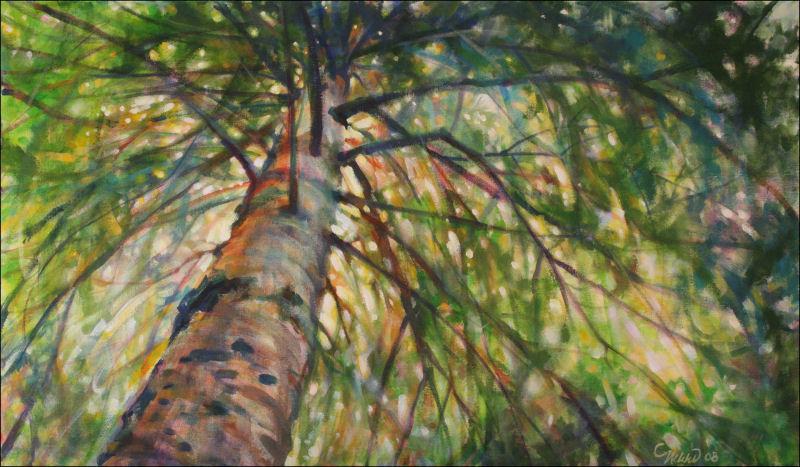
White Pine Bows, 18H x 30W x 2D inches acrylics on canvas, 2008. Sold.
Now on exhibition at Merging Visions, Creating a Unique Experience with Art and Poetry, April 1st – 30th at Emily Fowler Library and North Branch Library, Denton TX. Poems are written by members of the Denton Poets Assembly for existing Art works by members of the Visual Arts Society of Texas.
White Pine Bows by Debby Davis, October, 2008
Fragile notes fracture light into rainbow,
Bouncing branch to bough within stiff white pines,
finding my eyes uplifted; what a show!
Violinist gently pulls; taut bow whines.
Bouncing branch to bough within stiff white pines,
like the beat of an orchestra playing.
Violinist gently pulls; taut bow whines
raining harmonies; colors displaying.
Like the beat of an orchestra playing,
my thumping heart strings tug me into now!
raining harmonies; colors displaying,
I am an audience of one somehow.
My thumping heart strings tug me into now!
It is the secret that only I shall know.
I am an audience of one somehow.
Fragile notes fracture light into rainbow.
Eastern Redbuds
Saturday, April 11th, 2009

Eastern Redbuds – Spring in Dallas, TX – finished April 11, 2009, took off all remaining masking fluid. 11H x 11W x 3D inches, acrylics on canvas, wrapped sides painted. Signature is on the side, so one is superimposed here on the front. Hang on a wall or display on a flat surface.


 Eastern Redbuds is the first of sixteen 11H x 11W x 3D inches acrylics on canvas paintings of various aspects of trees, to hang together as a group or flanking other paintings. This one uses masking medium to block out areas of white. The first layer of dried medium was removed in the above thumbnails. Afternoon post, left: Adding another layer of masking fluid, seen as yellow.
Feb. 25th: below left, looks better turned on its side but it could be hung either direction, mask was removed then the painting was overworked unintentionally – all the marks that were the whole point of using masking fluid are hardly visible.
So on Feb. 26th: below right, more mask was applied, then white painted between branches, tore away a few select areas of the dried mask and left the rest on as texture.
$350.00 ![]()
Using masking medium
Friday, March 27th, 2009
Grand Fir in front of a giant Sequoia, 48H x 24W x 2D inches acrylics on canvas, using masking medium to outline the mossy dead branches.


Some work, some don’t, but I haven’t given up on it yet; work still in progress, but since this won’t be in the Raleigh show in 7 weeks I can’t afford to spend more time on it now. I hoped the flat white would work against a fairly realistic background, but it doesn’t. This could go a few ways: 1) flatten the whole surface and make the painting an abstract 2) downsize the sequoia, add shadow and color to the fir then create a more realistic forest scene 3) block out more dead firs with more masking fluid, echoing the main one, still as an abstract or realistic or 4) ditch it! Some paintings are worth spending time exploring when they reach a certain stage, and with others chalk it up as experience, re-cover the stretcher frame and move on.
Paint Arson
Thursday, March 26th, 2009

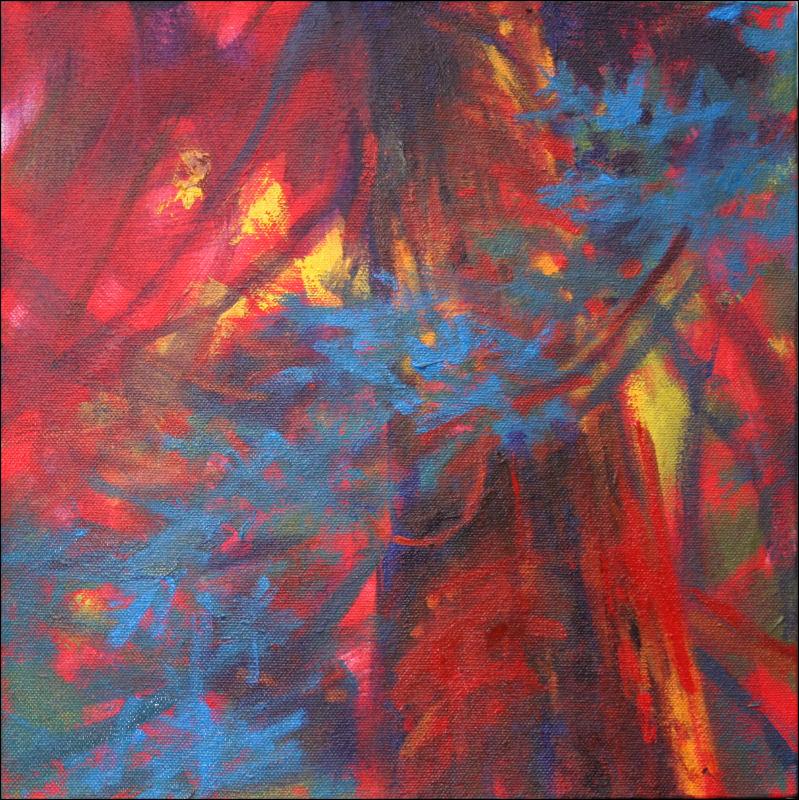
Paint Arson, 11H x 11W x 3D inches acrylics on canvas, wrapped sides painted.
Frame unnecessary. Hang on a wall or display on a flat surface. Signed on the side so as not to impose on the composition.
Progress and process phases 1 and 2 images.


Painting, whatever the subject may be, is a journey through all kinds of unanticipated thoughts and associations; some are short and sweet, ending within 1 – 6 hours and not much more than a visual, but some are packed full of adventure that isn’t even realized until surfacing from a few hours of work.
A new jar of Cadmium Red medium hue was just the thing to reboot, then re-route some old habits I was falling back into, like over-working paintings. Trying a new color invigorates the work process like nothing else can, adding certain life to the results as well. Incorporated as a base, straight out of the tube or mixed with your usual palette, a new color can change everything.
Branching Out
Friday, March 20th, 2009
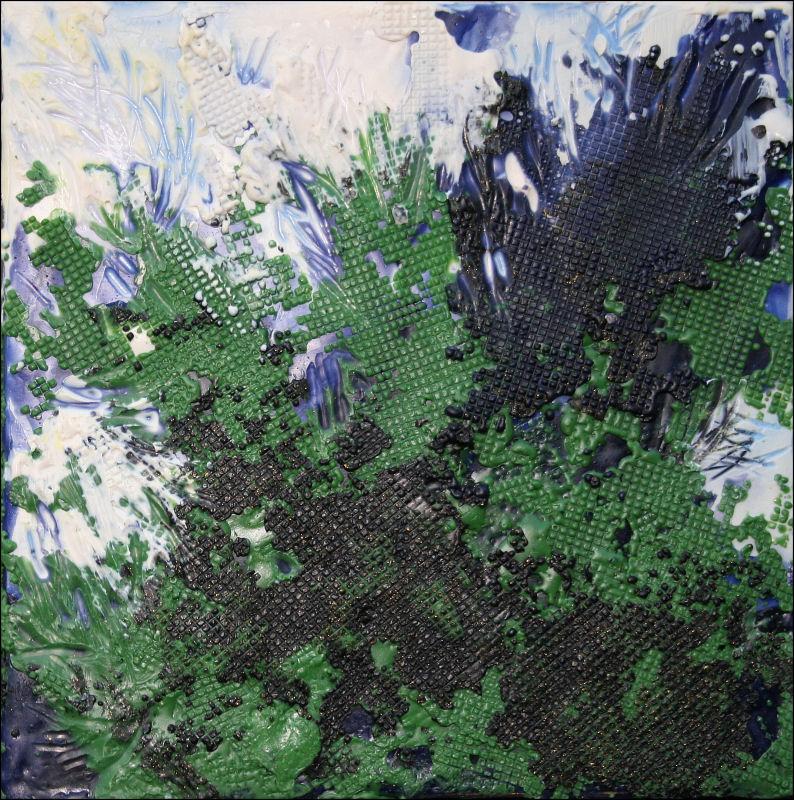
Branching Out and Conifer, each 6H x 6W x 2D inches Encaustic, side surfaces also done.
Encaustic is designing/painting with beeswax. I’m not usually intimidated by trying any new medium, but wax is so unique and there are so many possibilities for it, I was a little overwhelmed when I took an introductory course with Deanna Wood. She offers her students workshop days where they can use her supplies to continue experimenting with the medium. Although I’d love to have my own supplies to work at home, the encaustic process is so messy, not to mention expensive to get started, so that is a generous offer. Today’s studio work produced 4 small encaustic paintings, and 2 are successful. Compared to other media, wax is so versatile it can be scraped off to whatever degree, reworked, layered, carved and manipulated as much or as long as you wish. It’s a lot of fun!
« Previous Entries Next Entries »